
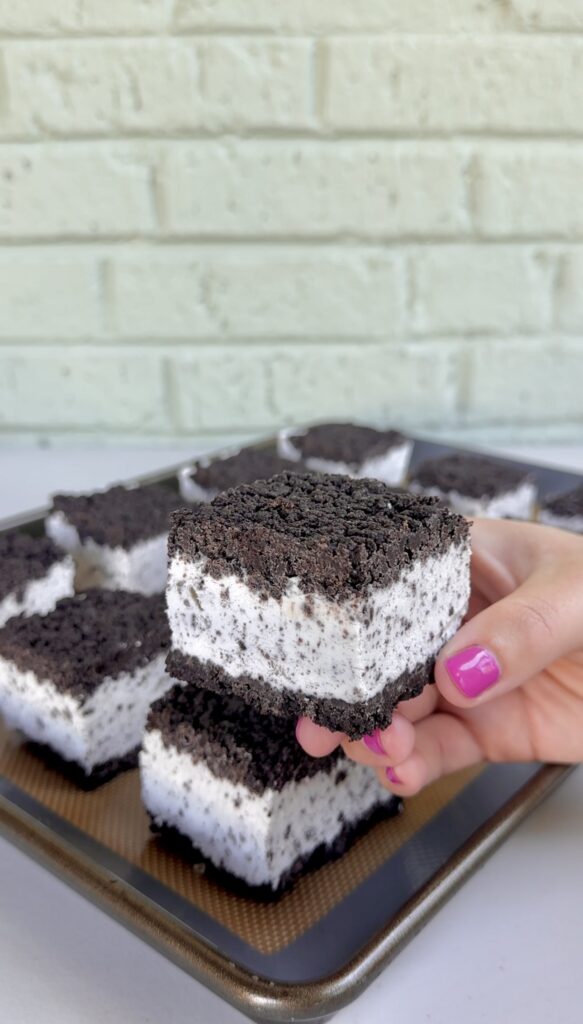
Oreo Ice Cream Sandwiches are made with layers of buttery Oreo cookie crust and a creamy no-churn cookies-and-cream ice cream filling, creating a rich, chocolatey frozen dessert that’s easy to make and perfect for hot summer days!
From gooey Rice Krispie Ice Cream Sandwiches, Frozen S’mores, and decadent Slutty Brownie Ice Cream Sandwiches to refreshing Key Lime Pie Grahamwiches, these easy homemade frozen treats are the perfect way to satisfy every summer dessert craving.
Why you’ll love this recipe:
If you love cookies-and-cream desserts, these Oreo Ice Cream Sandwiches are about to become your new favorite summer treat! They’re made with layers of buttery Oreo cookie crust and a creamy no-churn cookies-and-cream filling that freezes into perfectly handheld bars. Rich, chocolatey, and incredibly refreshing, they’re everything you love about classic ice cream sandwiches—only even better because they’re homemade!
The best part? You don’t need an ice cream maker to make them. If homemade ice cream has ever seemed intimidating, this recipe is the perfect place to start. There’s no cooking, no churning, and no special equipment required.
The filling is made by whipping heavy cream until it’s light and fluffy, then folding it together with sweetened condensed milk, vanilla, and crushed Oreo cookies. It creates a rich, creamy no-churn ice cream that’s smooth, scoopable, and full of cookies-and-cream flavor.
Layer that filling between two buttery Oreo cookie crusts, pop it in the freezer, and let time do the rest. It’s one of those desserts that looks impressive but is surprisingly simple to make!
Ingredients you’ll need:
- Heavy whipping cream
- Sweetened condensed milk
- Vanilla extract
- Oreos- crushed
- Butter- melted
Imagine your favorite cookies-and-cream ice cream wrapped in two rich, buttery Oreo cookie layers.
The cookie crust is firm enough to hold everything together, yet soft enough to bite into without crumbling apart. The filling is light, creamy, and packed with crushed Oreo cookies in every bite, giving you plenty of chocolate cookie crunch throughout!
Every layer is rich without feeling overly heavy, and the combination of creamy filling and chocolate cookies is hard to resist. If you’re already an Oreo fan, this dessert checks every box.
One of the best things about these homemade Oreo Ice Cream Sandwiches is how dependable they are. The recipe uses simple pantry staples, comes together with very little hands-on time, and can be made days in advance.
They’re also easy to customize. Add mini chocolate chips, swirl in hot fudge, mix in peanut butter, or try different Oreo flavors to make them your own. No matter how you serve them, they’re guaranteed to disappear quickly!
How to make the best Oreo Ice Cream Sandwiches:
- Line a 9×9 pan with parchment paper, leaving overhang on the sides, then set aside.
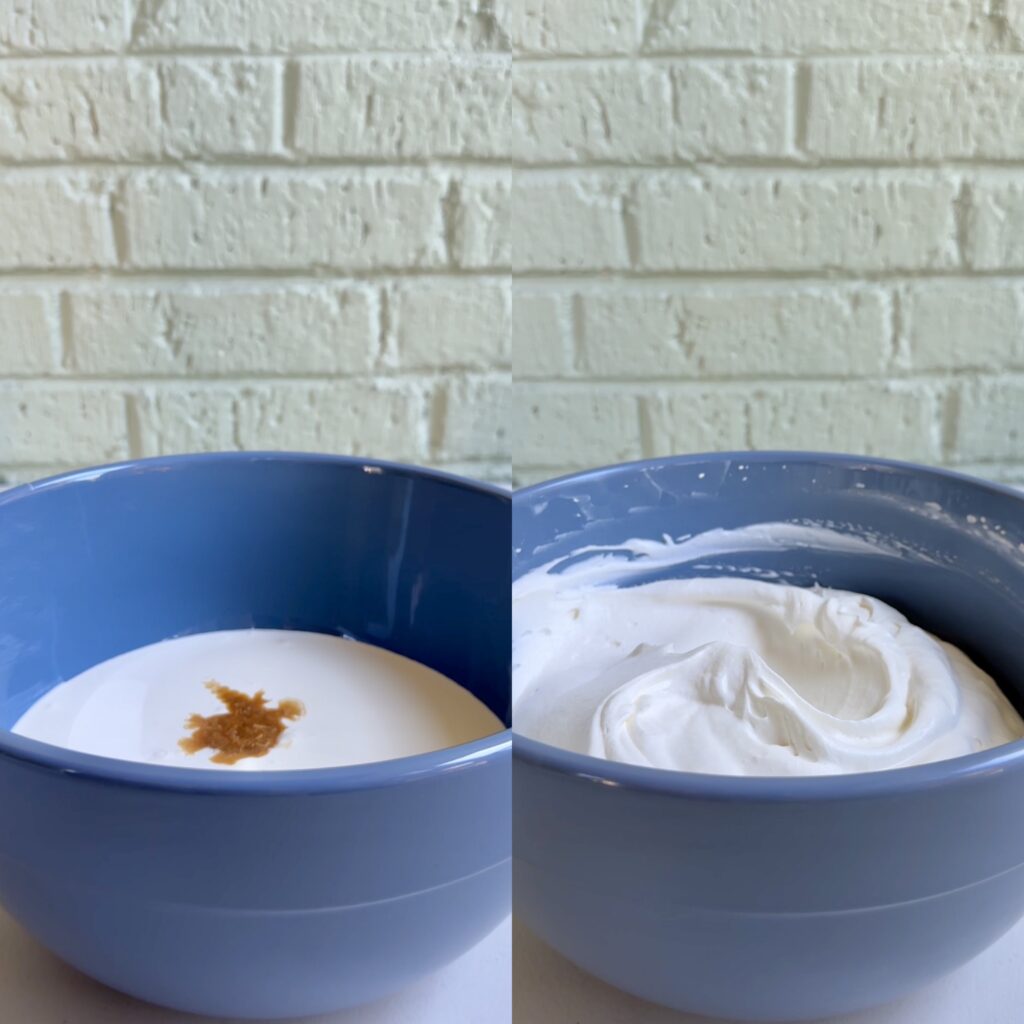
- In a large bowl, combine heavy cream, sweetened condensed milk, and vanilla extract, then whip with an electric mixer until stiff peaks form. Set aside.
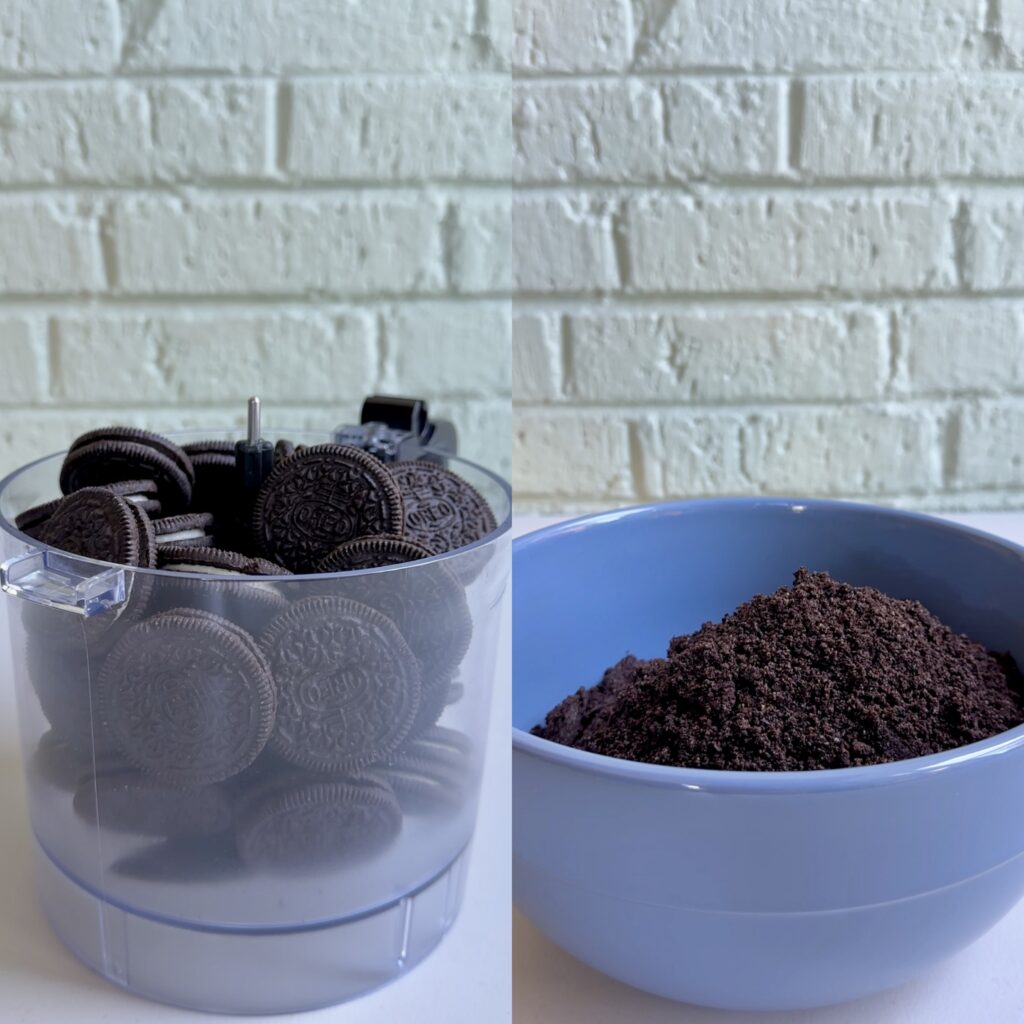
- Add the Oreo cookies into the bowl of your food processor and pulse the cookies into fine crumbs. If you don’t have a food processor, use a ziploc bag and rolling pin.
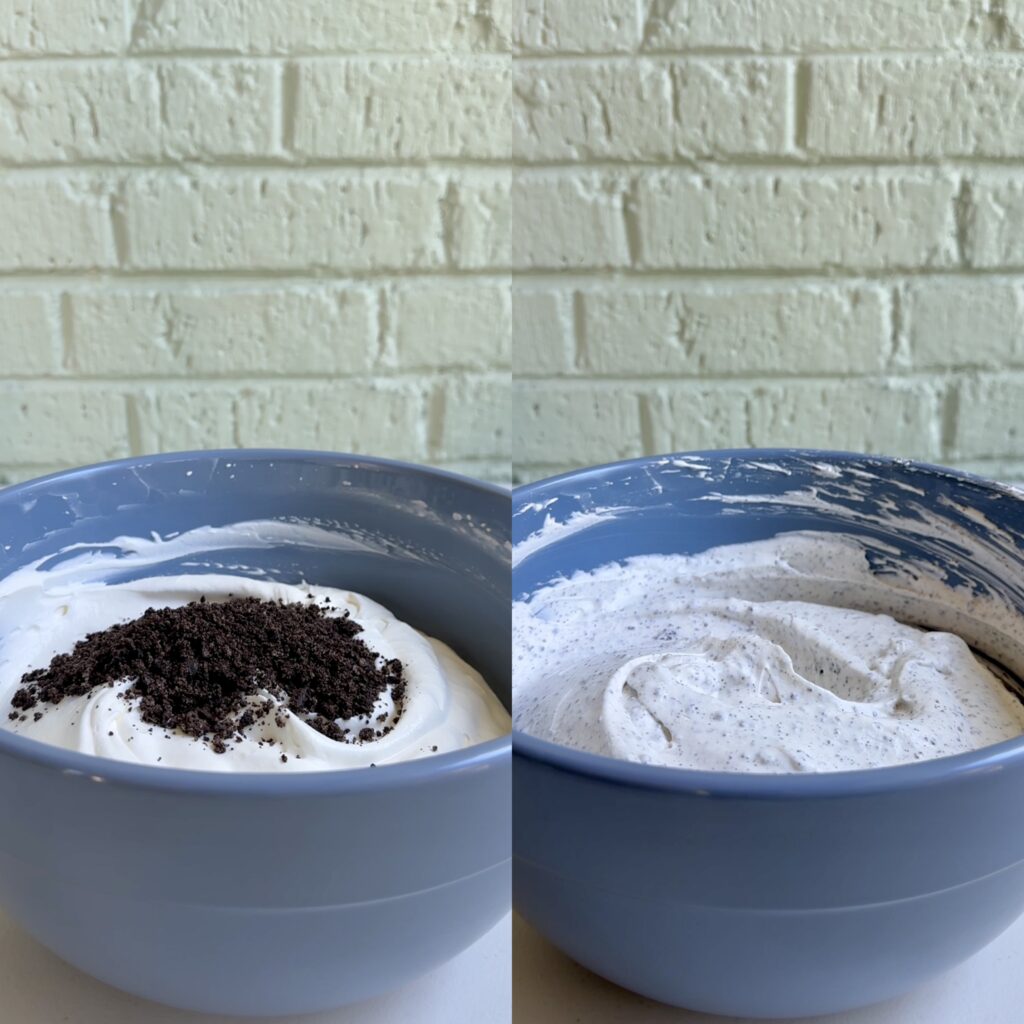
- Fold ½ cup of the Oreo crumbs into the whipped filling to create a cookies-and-cream ice cream filling.
- In a medium sized mixing bowl, combine the remaining Oreo crumbs with melted butter and mix until the consistency resembles wet sand.
- Press half of the Oreo mixture firmly into the prepared pan using the bottom of a shot glass or measuring cup.
- Spread the cookies and cream filling evenly over the packed crust and smooth the top.
- Sprinkle the remaining Oreo crust mixture over the top and gently press into an even layer.
- Freeze at least 6 hours or overnight.
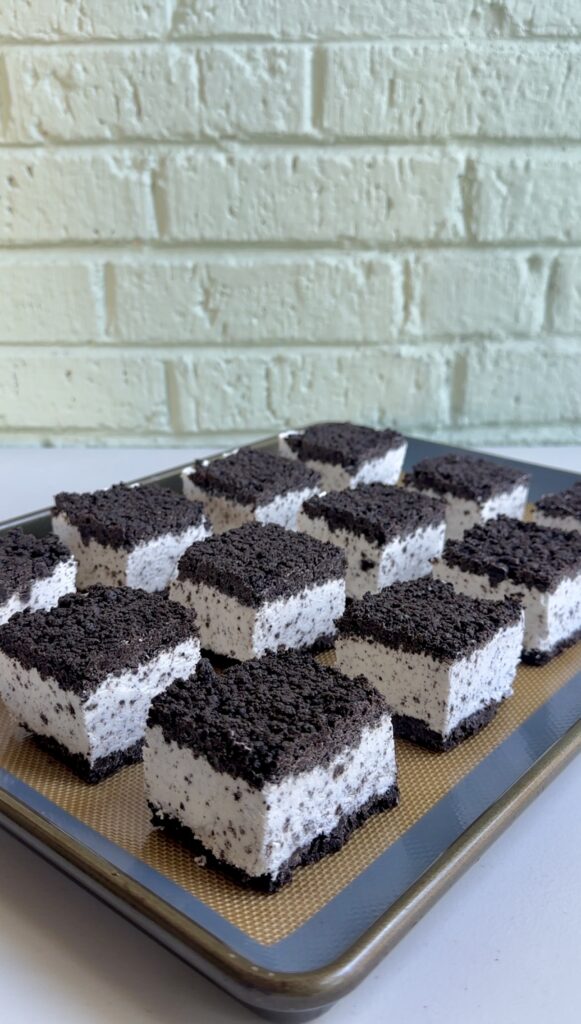
- Once frozen, lift from the pan using the parchment paper overhand and slice into equal sized squares or rectangles.
- Individually wrap any leftovers in plastic wrap and return to the freezer for later!
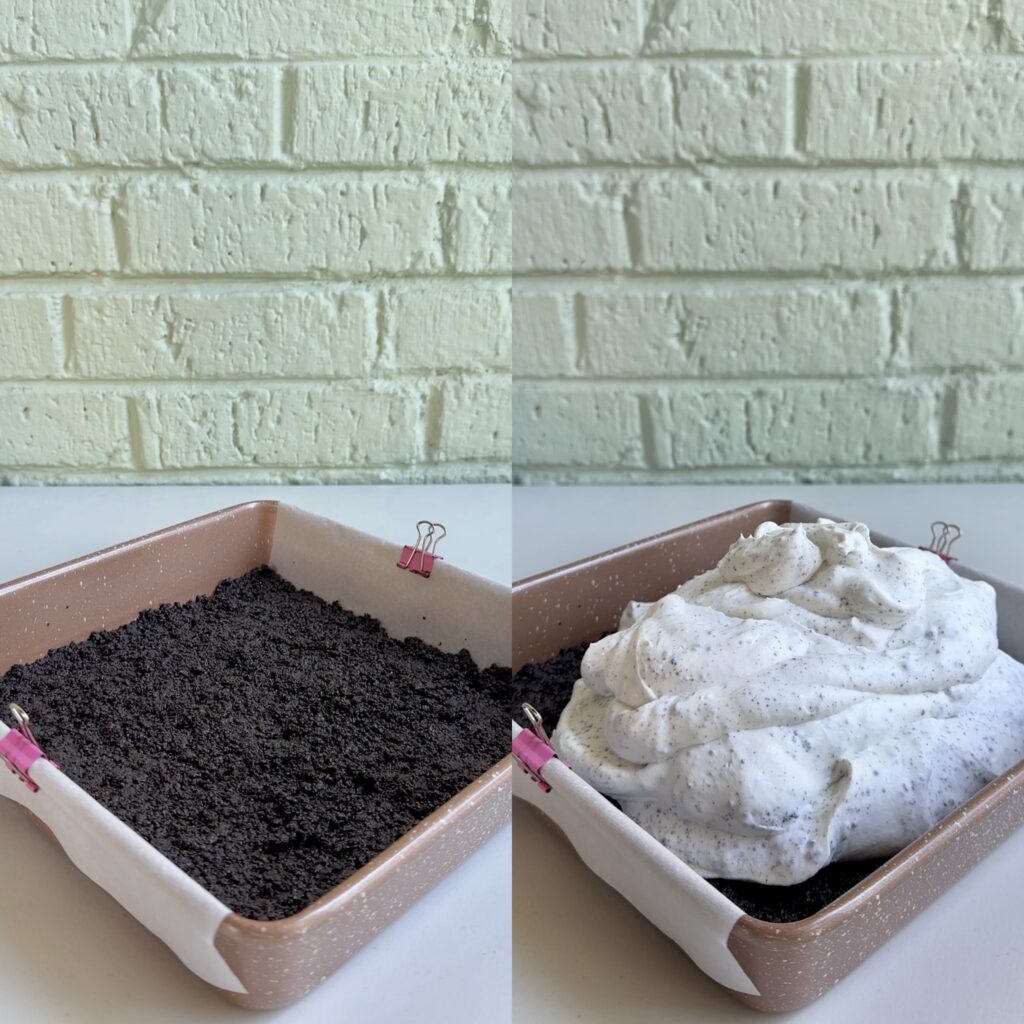
When the weather is warm, it’s hard to beat a cold, creamy dessert straight from the freezer.
These Oreo Ice Cream Sandwiches are refreshing, satisfying, and easy to make ahead, so they’re always ready whenever a sweet craving hits. Whether you’re hosting a backyard barbecue, celebrating a birthday, or just looking for something cool after dinner, these frozen treats are always a hit.
Since they’re already sliced into bars, they’re also easy to grab and serve. No scooping. No melting bowls of ice cream. Just pick one up and enjoy!
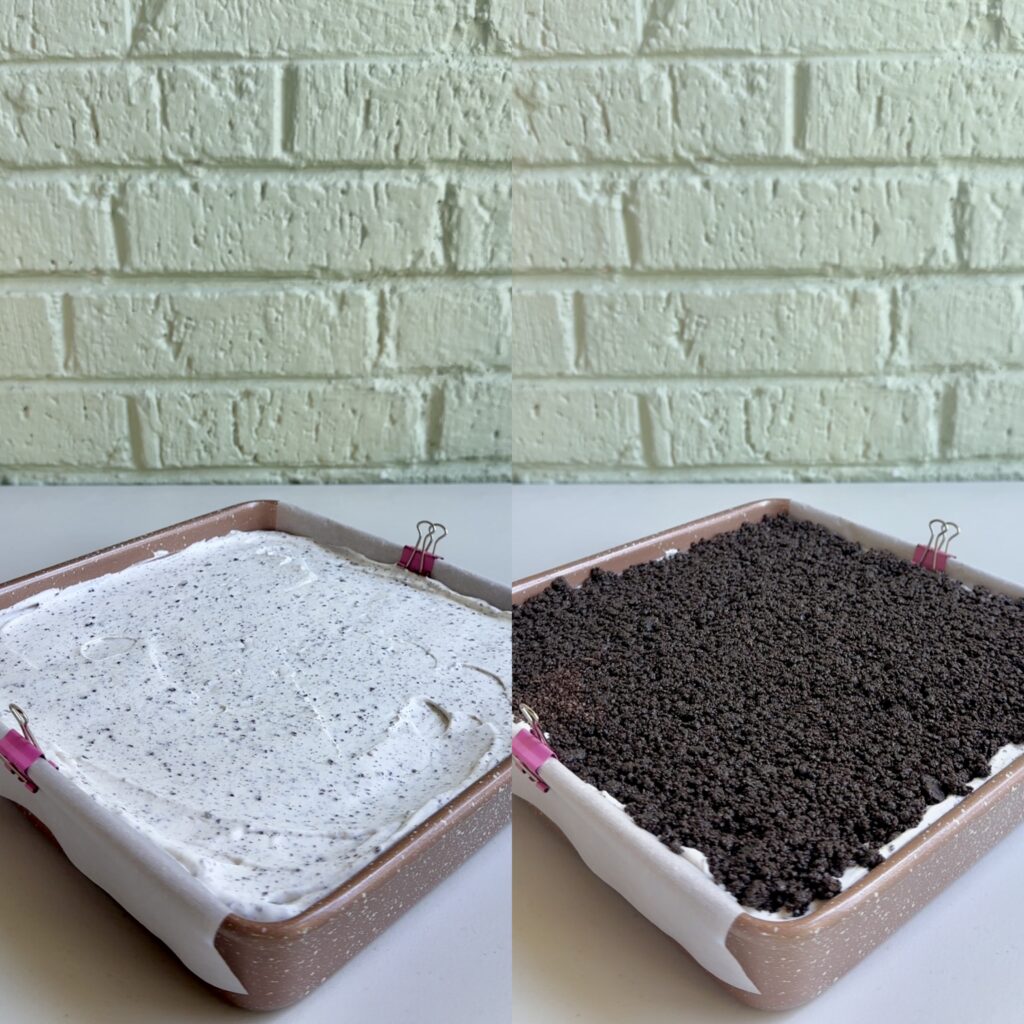
My top tips:
- PREP YOUR PAN: Line your pan with parchment paper, but leave an overhang on the sides so you can easily lift the frozen sandwiches out of the pan once they are frozen.
- ELECTRIC MIXER: Use an electric mixer for the filling. Beating the filling with a hand or stand mixer creates a light, fluffy texture and ensures all of the ingredients are fully combined. You can do this by hand, but it will take much longer for the heavy cream to reach stiff peaks.
- FOOD PROCESSOR: For efficiency, I like using a food processor to crush the Oreos into fine crumbs. I also find that using a food processor gives the cookie crumbs a more even texture, but you can also place the cookies in a zip-top bag and crush them with a rolling pin.
- MIXING THE CRUST: Mix the melted butter thoroughly into the cookie crumbs. Every crumb should be lightly coated with melted butter so the cookie layers hold together after freezing.
- FORMING THE CRUST: Make sure you press the bottom crust firmly into the pan. Use the bottom of a measuring cup or glass to create an even, compact layer that won’t crumble when sliced.
- LAYERING: Spread the filling evenly. An offset spatula makes it easy to create a smooth, level layer for uniform sandwiches.
- FREEZING: Freeze these ice cream sandwiches until completely firm. I recommend giving them several hours—or preferably overnight—to freeze before cutting. This creates clean slices and helps the sandwiches hold their shape.
- SLICING: For clean slices, warm your knife between cuts. Dip a sharp knife in hot water, wipe it dry, and clean it between each cut for the neatest edges.
- STORING: Wrap individual sandwiches in plastic wrap and keep them in an airtight freezer container for up to 2 weeks to prevent freezer burn.
Looking for more Oreo cookie treats? Check these out!
- Reese’s Stuffed Oreos
- Oreo Truffle Cookie Bars
- Oreo Cheesecake Bites
- Oreo Fudge Bites
- White Chocolate Raspberry Oreo Balls
- Monster Cookie Dough Oreos
- Caramel Pretzel Oreos
- Banana Spit Oreos
- Strawberry Shortcake Oreo Truffles
- Oreo Dip
- Oreo Truffle Stuffed Strawberries
- Cookies and Cream Bark
- Cookies and Cream Popcorn
Oreo Ice Cream Sandwiches
Equipment
Ingredients
- 2 cups heavy whipping cream
- 1/2 cup sweetened condensed milk
- 1 tbsp vanilla extract
- 50 Oreo cookies
- 3/4 cup butter melted
Instructions
- Line a 9×9 pan with parchment paper, leaving overhang on the sides, then set aside.
- In a large bowl, combine heavy cream, sweetened condensed milk, and vanilla extract, then whip with an electric mixer until stiff peaks form. Set aside.
- Add the Oreo cookies into the bowl of your food processor and pulse the cookies into fine crumbs. If you don’t have a food processor, use a ziploc bag and rolling pin.
- Fold ½ cup of the Oreo crumbs into the whipped filling to create a cookies-and-cream ice cream filling.
- In a medium sized mixing bowl, combine the remaining Oreo crumbs with melted butter and mix until the consistency resembles wet sand.
- Press half of the Oreo mixture firmly into the prepared pan using the bottom of a shot glass or measuring cup.
- Spread the cookies and cream filling evenly over the packed crust and smooth the top.
- Sprinkle the remaining Oreo crust mixture over the top and gently press into an even layer.
- Freeze at least 6 hours or overnight.
- Once frozen, lift from the pan using the parchment paper overhand and slice into equal sized squares or rectangles.
- Individually wrap any leftovers in plastic wrap and return to the freezer for later!
This post contains Amazon Affiliate links. Dangthatssweet may receive a small commission for Amazon purchases made through these links at no cost to you. Thanks for your support!

Leave a Reply