
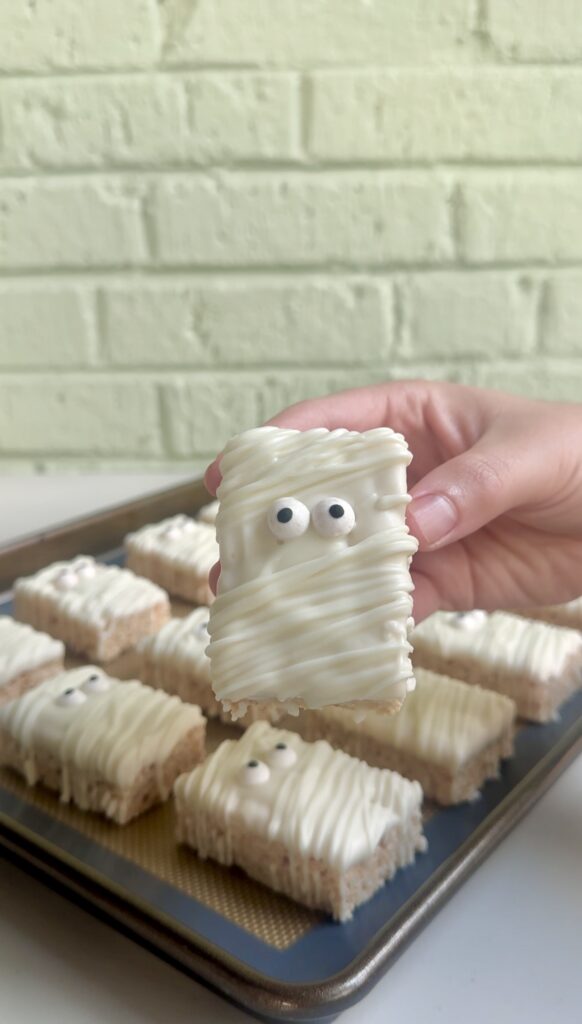
Mummy Rice Krispie Treats are an easy, no-bake Halloween treat made with store-bought Rice Krispie Treats dipped in creamy white chocolate, topped with candy eyes, and drizzled with white chocolate mummy bandages for a festive, spooky-cute dessert.
If you love easy, festive treats that come together in minutes, check out my other no-bake Halloween treats like No Bake Oreo Bat Cookies, Frankenstein Rice Krispie Treats, and Marshmallow Ghost Cookies for more spooky-sweet recipes that are just as fun to make as they are to eat!
Why you’ll love this recipe:
Need a cute Halloween treat that takes almost no effort to make? These Mummy Rice Krispie Treats are it! They’re sweet, spooky, and ridiculously easy to put together. And the best part? You can make them with store-bought Rice Krispie Treats, so there’s no need to spend time making a batch from scratch!
All you need is some white chocolate, candy eyes, and a few minutes to turn an everyday snack into the cutest little mummies. They’re perfect for Halloween parties, classroom treats, fall get-togethers, or just a fun afternoon in the kitchen with the kids.
Honestly, I love a Halloween recipe that looks like you spent way more time on it than you actually did, and these definitely fit the bill!
Ingredients you’ll need:
- Rice Krispies Treats- i used store-bought but you can make them homemade too
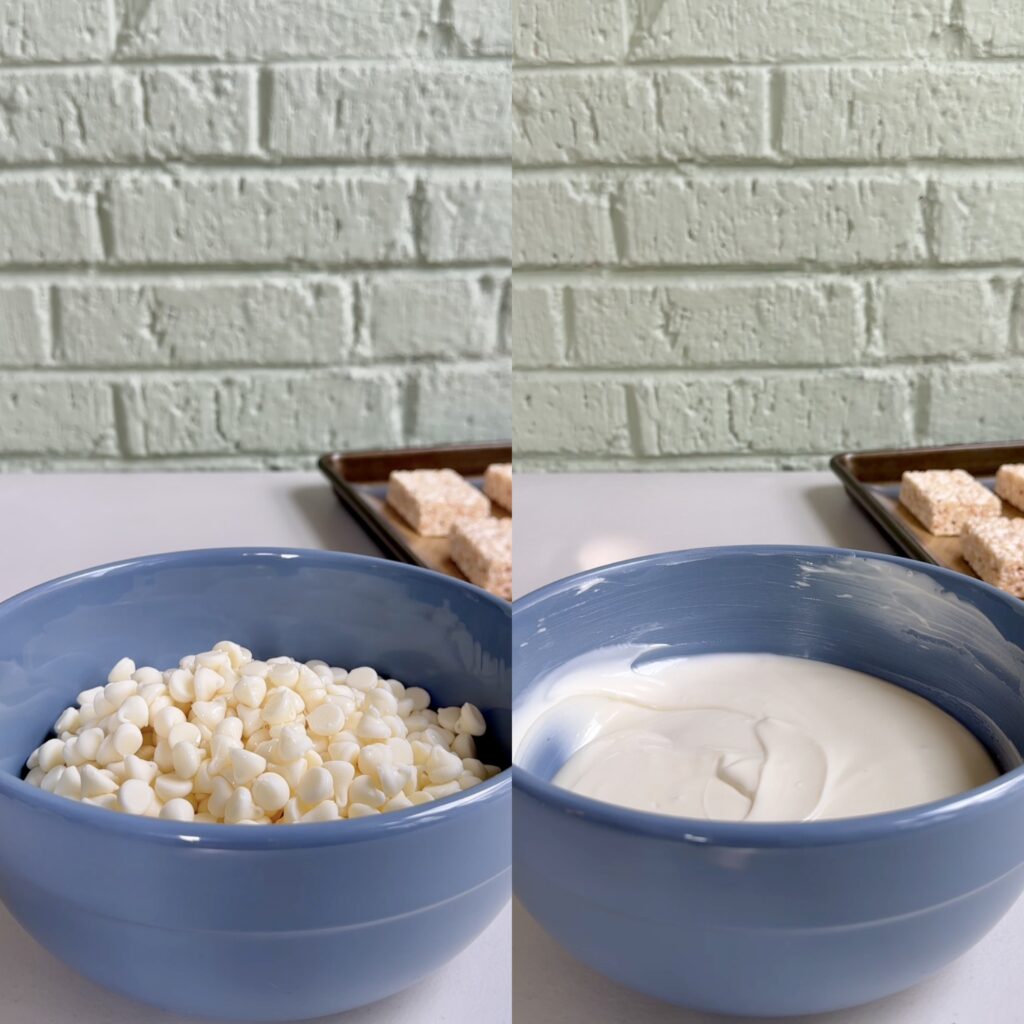
- White chocolate chips
- Vegetable oil
- Candy eyes
Halloween is the perfect excuse to make fun, festive desserts, but I don’t always want to spend hours in the kitchen making them. That’s why these easy Mummy Rice Krispie Treats are such a favorite. They look adorable, taste delicious, and require almost no prep work.
Using store-bought Rice Krispie Treats is the ultimate shortcut. There’s no melting marshmallows, mixing cereal, or waiting for homemade treats to cool. Just unwrap, dip, and decorate!
I also love how simple these are to customize. A little melted white chocolate creates the mummy bandages, and two candy eyes give each treat its own personality. Some might look a little silly, some a little spooky, but that’s part of the fun!
If you’re looking for easy Halloween treats for kids or a last-minute dessert for a Halloween party, these are always a great option!
How to make the best Mummy Rice Krispie Treats:
- Unwrap the Rice Krispie Treats and place them on a baking sheet lined with parchment paper or a silicone baking mat.
- In a microwave safe bowl, combine white chocolate chips and vegetable oil. Microwave in 30 second intervals, stirring in-between, until melted and smooth.
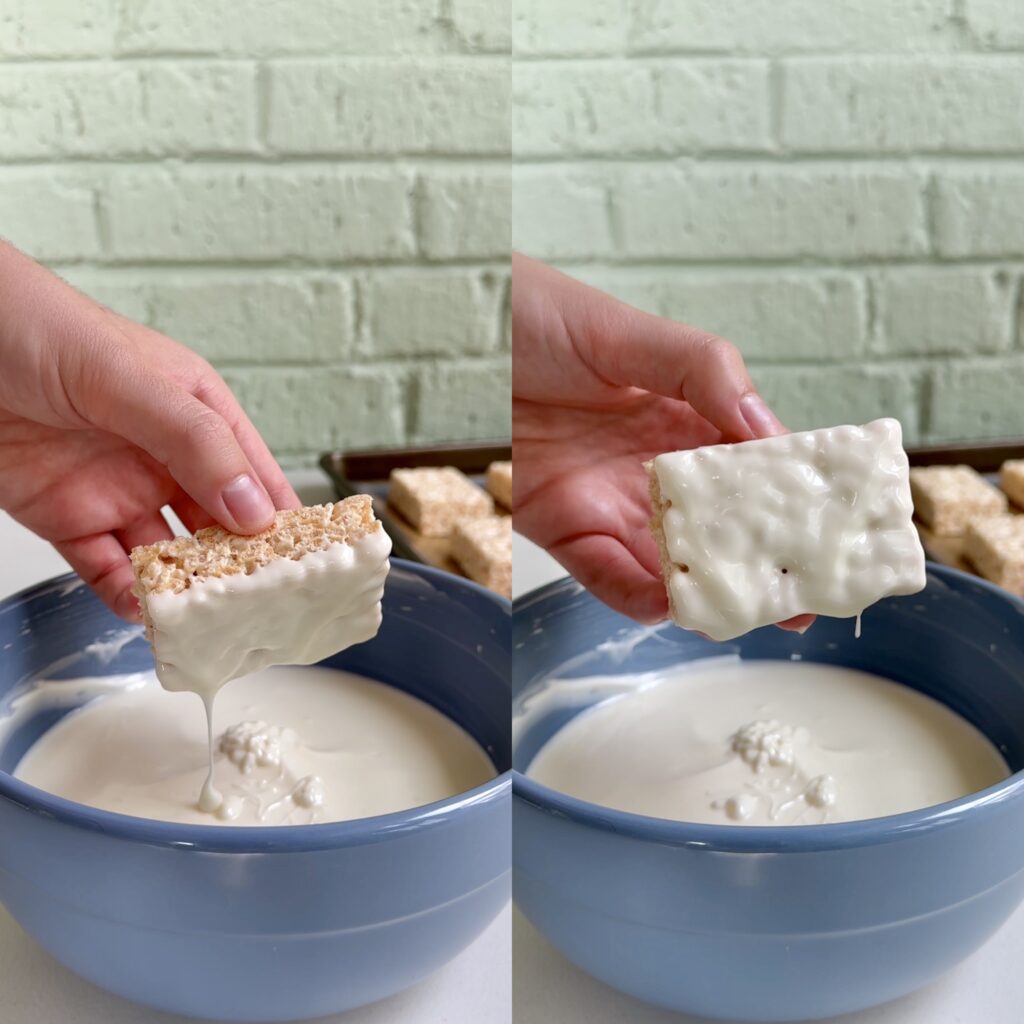
- Dip the front of each Rice Krispie Treat into the melted chocolate and return to the prepared baking sheet.
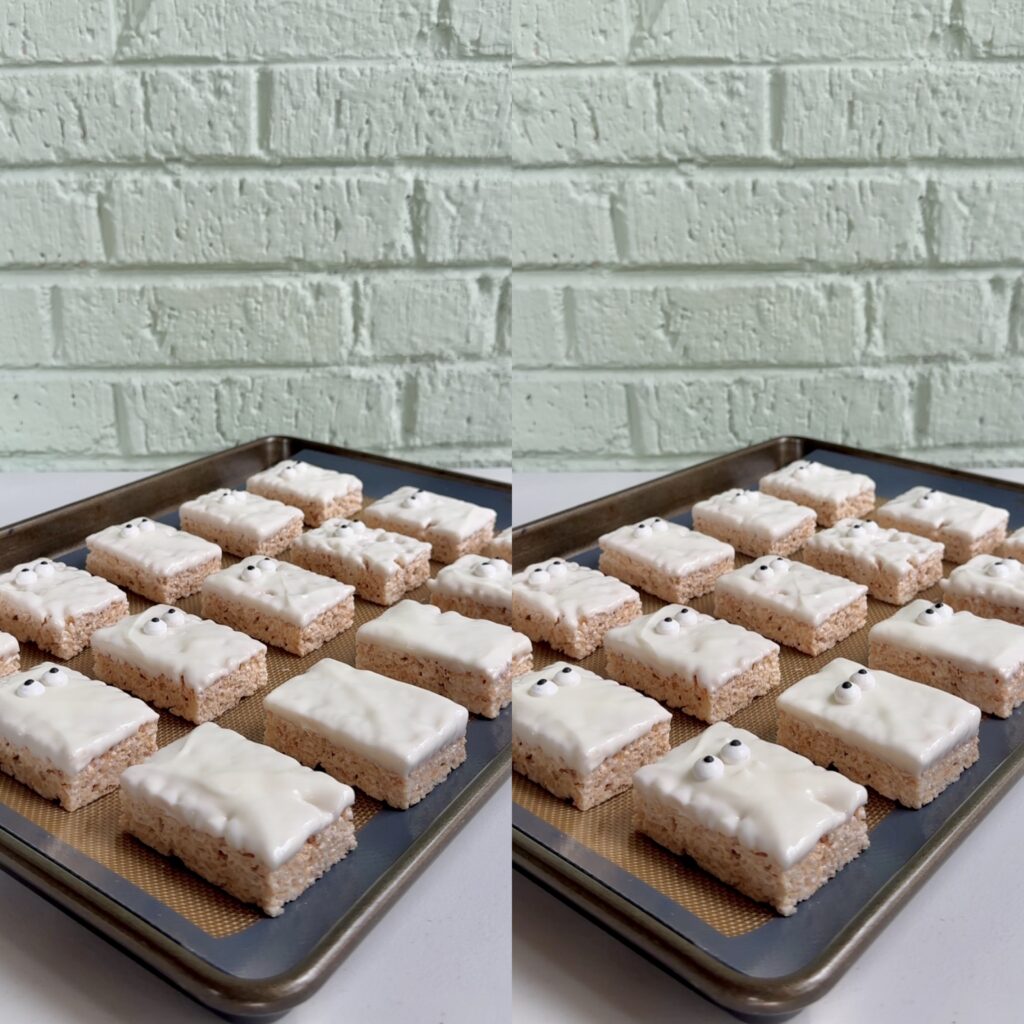
- Add two candy eyes onto each dipped Rice Krispie Treat before the chocolate sets, then transfer to the fridge or freezer for 5-10 minutes or until the chocolate has hardened.
- Transfer the remaining melted chocolate into a Ziploc bag, cut off one corner, then pipe thin lines in multiple directions across each treat, making sure to avoid the eyes.
- Return to the fridge or freezer for another 10 minutes to set the chocolate drizzle. Once set, carefully break off the excess candy-coating pieces around each Rice Krispie Treat before enjoying!
Whether you’re planning a Halloween party, putting together a spooky dessert table, or looking for easy Halloween treats for kids, these Mummy Rice Krispie Treats are sure to be a hit!
One of my favorite things about these Mummy Rice Krispie Treats is how easy they are to serve. Since each treat is already individually portioned, you don’t have to cut anything or worry about serving up dessert when your guests arrive.
Arrange them on a Halloween platter, and they instantly add a fun, festive touch to your dessert table. They’re especially cute alongside Halloween cookies, chocolate-covered pretzels, and other spooky sweets.
They’re also a fun option for classroom Halloween parties, neighborhood gatherings, and Halloween movie nights. You can even wrap them individually in clear treat bags with orange and black ribbon for an easy party favor.
And if you’re making Halloween treats with kids, this is a great recipe to try together! Let them add the candy eyes or drizzle on the white chocolate bandages. It doesn’t matter if the mummies look a little wonky. That’s what makes them so cute!
FAQ:
Can I use store-bought Rice Krispie Treats?
Yes! Store-bought Rice Krispie Treats are the secret to making this recipe so quick and easy. Since the treats are already prepared and individually portioned, all you need to do is dip and decorate them.
How do I make the mummy bandages?
Simply drizzle melted white chocolate over the coated treats in thin, overlapping lines. Vary the direction and spacing of the lines to create the look of wrapped mummy bandages.
When should I add the candy eyes?
Add the candy eyes while the base coating is still wet so they adhere properly. If the chocolate has already set, attach them with a small dab of melted white chocolate.
Can I make these Halloween Rice Krispie treats ahead of time?
Yes! They’re a great make-ahead Halloween dessert. Prepare them a day or two before your event, allow the chocolate to set completely, and store them in an airtight container in a cool, dry place.
Are Mummy Rice Krispie Treats good for Halloween parties?
Definitely! They’re individually portioned, easy to serve, and instantly recognizable as a Halloween-themed dessert. Their cute appearance makes them a great addition to party tables, classroom celebrations, and family Halloween gatherings.
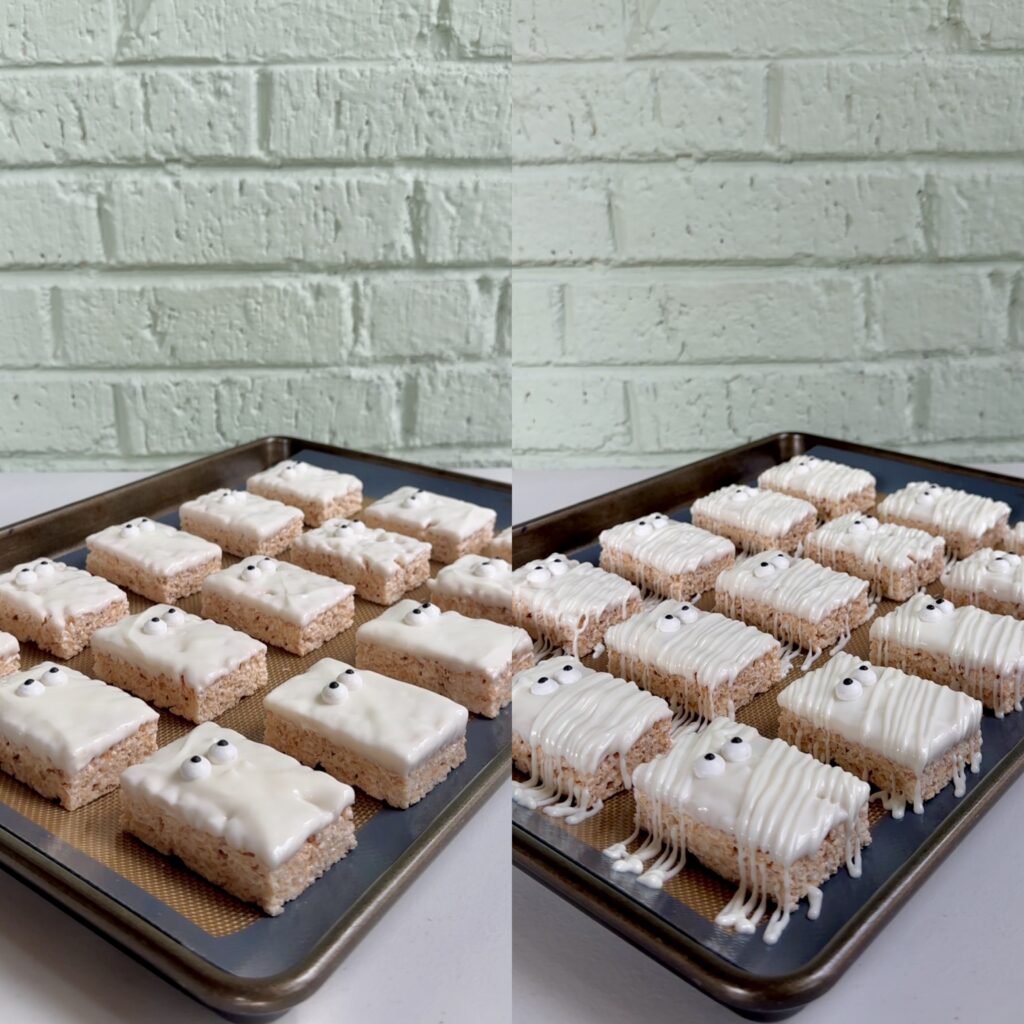
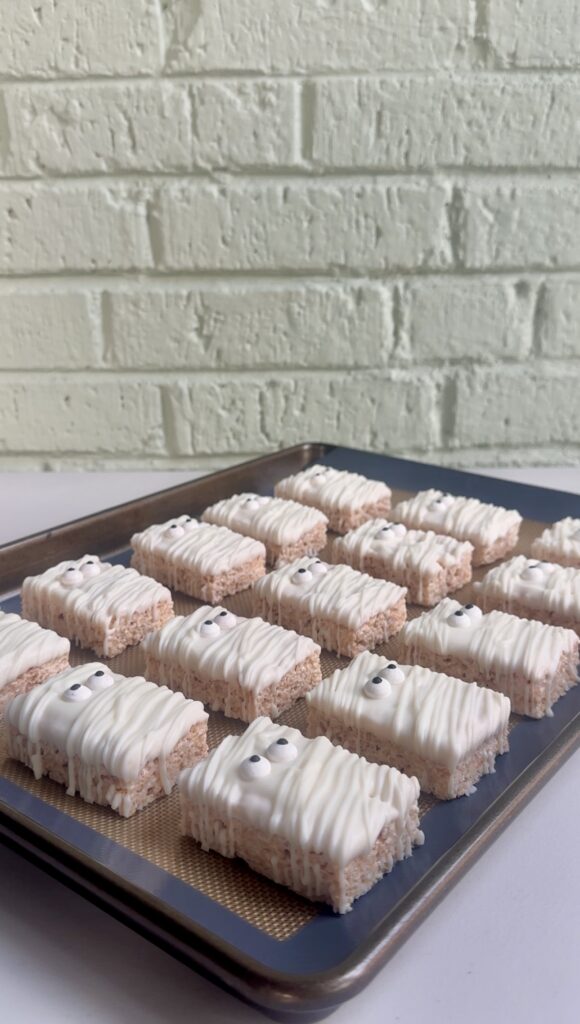
These Mummy Rice Krispie Treats prove that Halloween desserts don’t have to be complicated to be adorable. With store-bought Rice Krispie Treats, a little melted white chocolate, and a pair of candy eyes, you can create a festive no-bake dessert that looks like you spent far more time making it than you actually did.
They’re quick, fun, kid-friendly, and perfect for Halloween parties, school celebrations, or a cozy night of spooky movies at home. Plus, the simple decorating process makes them a great activity for the whole family.
My top tips:
- RICE KRISPIE TREATS: Using store-bought Rice Krispie Treats makes this recipe quick and easy! If you want to make homemade Rice Krispie Treats, I recommend using a recipe that fits a 9×13 pan.
- PREP YOUR BAKING SHEET: Be sure to line your baking sheet with parchment paper or a silicone mat to prevent sticking. This makes it much easier to lift the treats once they’re chilled.
- HEATING WHITE CHOCOLATE: It’s important to heat the white chocolate in 30 second intervals because white chocolate burns and seizes easily. It’s hard to reverse clumpy white chocolate, so I recommend watching it closely!
- VEGETABLE OIL: I like adding vegetable oil to the white chocolate to thin it out a little and make it more suitable for dipping and drizzling. You could also use coconut oil for a similar result.
- ADDING THE EYES: It’s important to add the candy eyes before the chocolate has set. This is the only way the eyes will stick. The black dots on the candy eyes do tend to smudge easily, so if you have large fingers or hot hands, I recommend using tweezers while handling them to prevent smearing.
- SETTING: White chocolate sets much faster than other chocolate varieties, so you may need to reheat the remaining melted white chocolate drizzling on the mummy markings.
- ADDING THE LINES: If you don’t have a Ziploc bag, you can use a spoon to drizzle a small amount of chocolate across the dipped cookies. The most important thing is that you let the first coating of chocolate set completely before adding the lines to prevent them from blending.
- STORING: Keep any leftovers in an airtight container in a cool, dark place for up to 5 days. If your kitchen is warm or humid, store them in the refrigerator so the chocolate stays firm.
Looking for more fun, festive Halloween treats? Check these out!
- Oreo Spiders
- Candy Corn Fudge
- Pretzel Eyeballs
- Halloween Monster Munch Popcorn Mix
- Oreo Witch Hat Cookies
- Dirt Pudding Cookie Cups
- Nutter Butter Mummies
- Pumpkin Patch Dirt Cups
Mummy Rice Krispie Treats
Ingredients
- 1 (16 ct) box Rice Krispies Treats
- 1 (12 oz) bag white chocolate chips roughly 2 cups
- 2 tbsp vegetable oil
- 32 candy eyes for decorating
Instructions
- Unwrap the Rice Krispie Treats and place them on a baking sheet lined with parchment paper or a silicone baking mat.
- In a microwave safe bowl, combine white chocolate chips and vegetable oil. Microwave in 30 second intervals, stirring in-between, until melted and smooth.
- Dip the front of each Rice Krispie Treat into the melted chocolate and return to the prepared baking sheet.
- Add two candy eyes onto each dipped Rice Krispie Treat before the chocolate sets, then transfer to the fridge or freezer for 5-10 minutes or until the chocolate has hardened.
- Transfer the remaining melted chocolate into a Ziploc bag, cut off one corner, then pipe thin lines in multiple directions across each treat, making sure to avoid the eyes.
- Return to the fridge or freezer for another 10 minutes to set the chocolate drizzle. Once set, carefully break off the excess candy-coating pieces around each Rice Krispie Treat before enjoying!
This post contains Amazon Affiliate links. Dangthatssweet may receive a small commission for Amazon purchases made through these links at no cost to you. Thanks for your support!

Leave a Reply