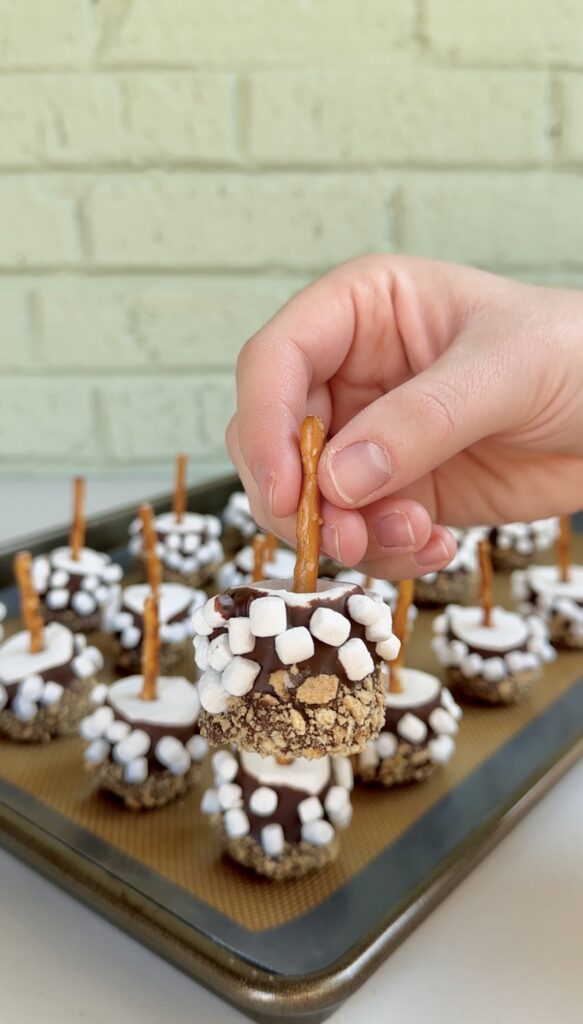
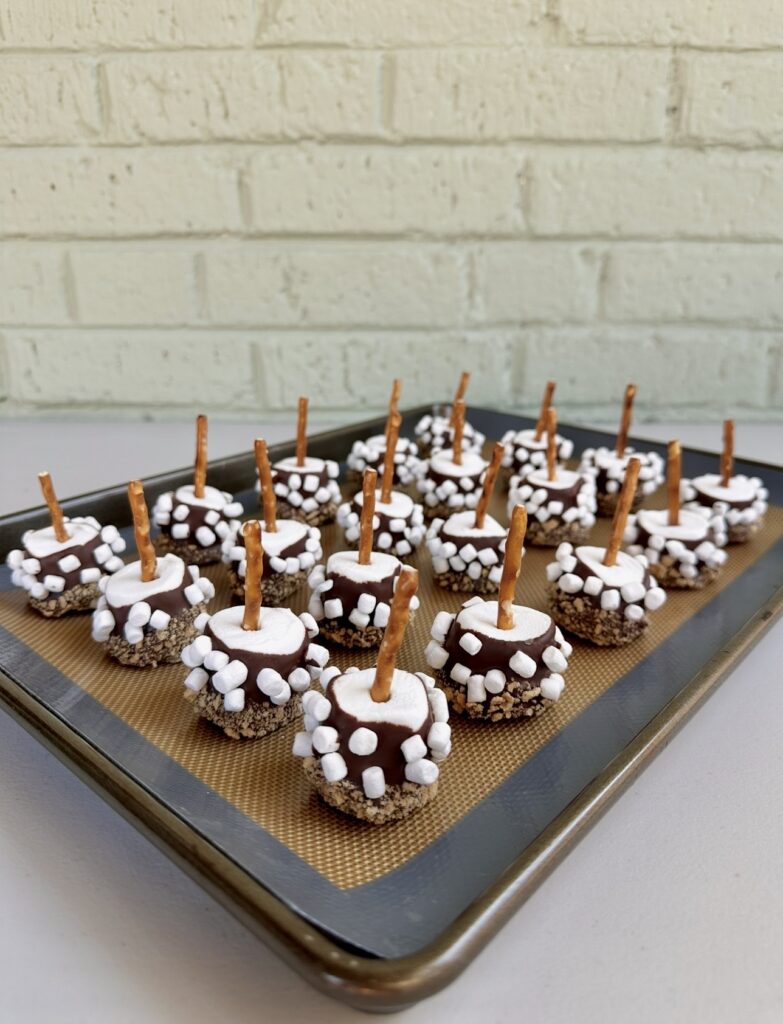
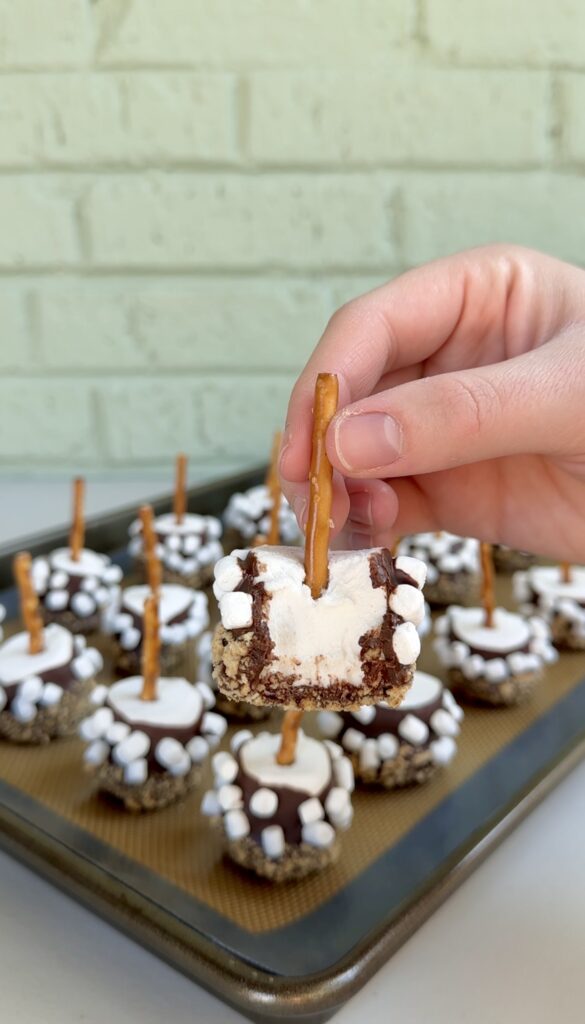
S’mores Marshmallow Pops are fluffy marshmallows on salty pretzel stick handles dipped in creamy milk chocolate, coated in crunchy graham cracker crumbs, and topped with marshmallow bits for the perfect no-bake sweet-and-salty treat.
I love s’mores, and I want the flavor of s’mores all year long! From Caramel S’mores Nachos, S’mores Brownie Bites, S’mores Strawberries, S’mores Puppy Chow, S’mores Cookie Cups, S’mores Bark, and Caramel S’mores Clusters – you can tell I love these flavors!
Why you’ll love this recipe:
If you’re looking for the best S’mores Marshmallow Pops recipe, this is it. These no-bake marshmallow pops are everything you love about classic s’mores — but easier, cuter, and way less messy. No campfire. No oven. No stress!
Just soft marshmallows, salty pretzel stick handles, melted milk chocolate, crushed graham cracker crumbs, and a sprinkle of marshmallow bits. That’s it. And somehow, that simple combo turns into one of the most addictive sweet and salty desserts you’ll ever make!
If you love chocolate-covered marshmallows or sweet and salty party treats, you’ll love these.
Ingredients you’ll need:
- Marshmallows
- Pretzel sticks
- Milk chocolate chips
- Vegetable oil
- Graham cracker crumbs
- Marshmallow bits
Traditional s’mores are delicious, but they require a fire, sticky fingers, and perfect timing. These no-bake s’mores on a stick give you all that nostalgic flavor without the hassle.
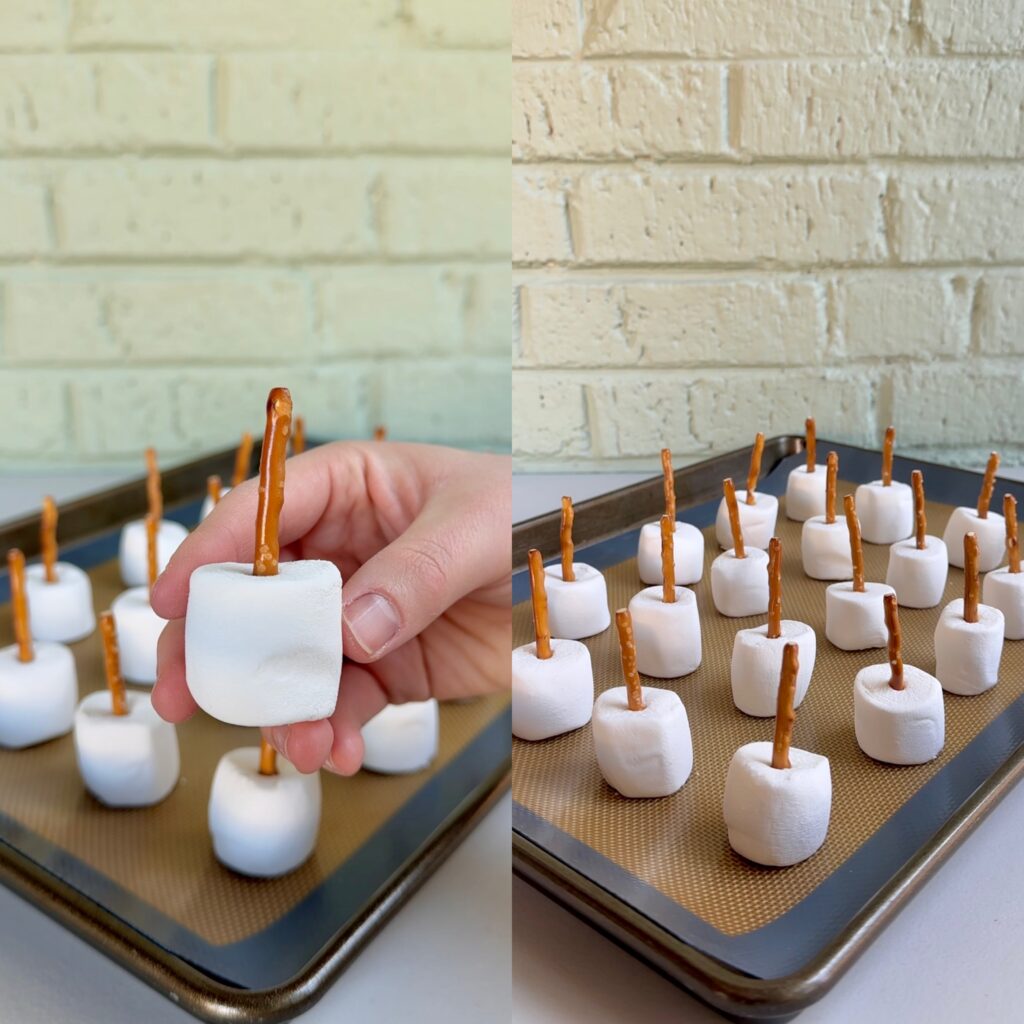
Instead of sandwiching everything between graham crackers, you slide a pretzel stick into a marshmallow to create the “handle.” Then you dip it into smooth melted milk chocolate and roll it in crushed graham cracker crumbs. A light sprinkle of marshmallow bits on top makes them look bakery-worthy!
They taste like summer — but upgraded.
How to make the best S’mores Marshmallow Pops:
- Insert a pretzel stick into the top of each marshmallow, then place them on a baking sheet with parchment paper or a silicone baking mat.
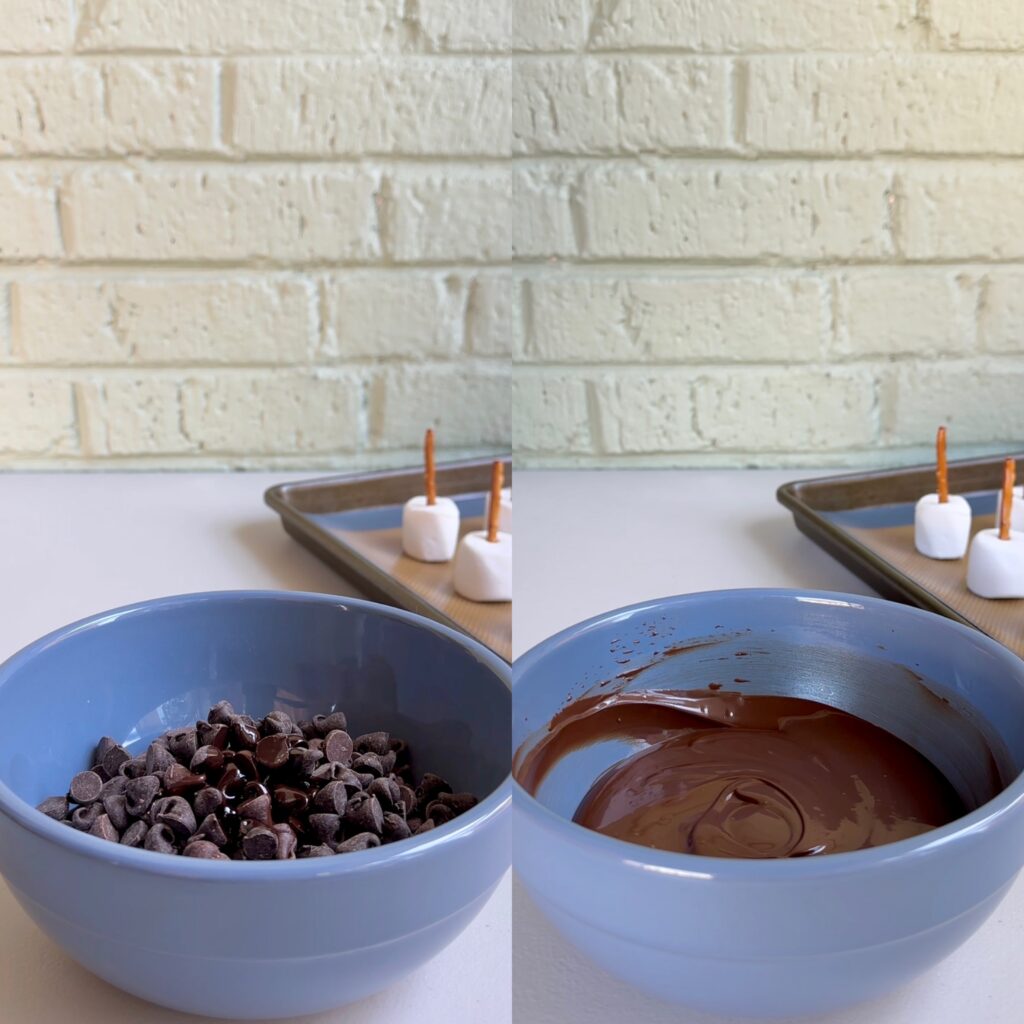
- In a microwave safe bowl, combine the chocolate chips and vegetable oil. Microwave in 30 second intervals, stirring in between, until melted and smooth.
- Pour your graham cracker crumbs and marshmallow bits into two separate bowls and set aside. This will create a “dipping station”.
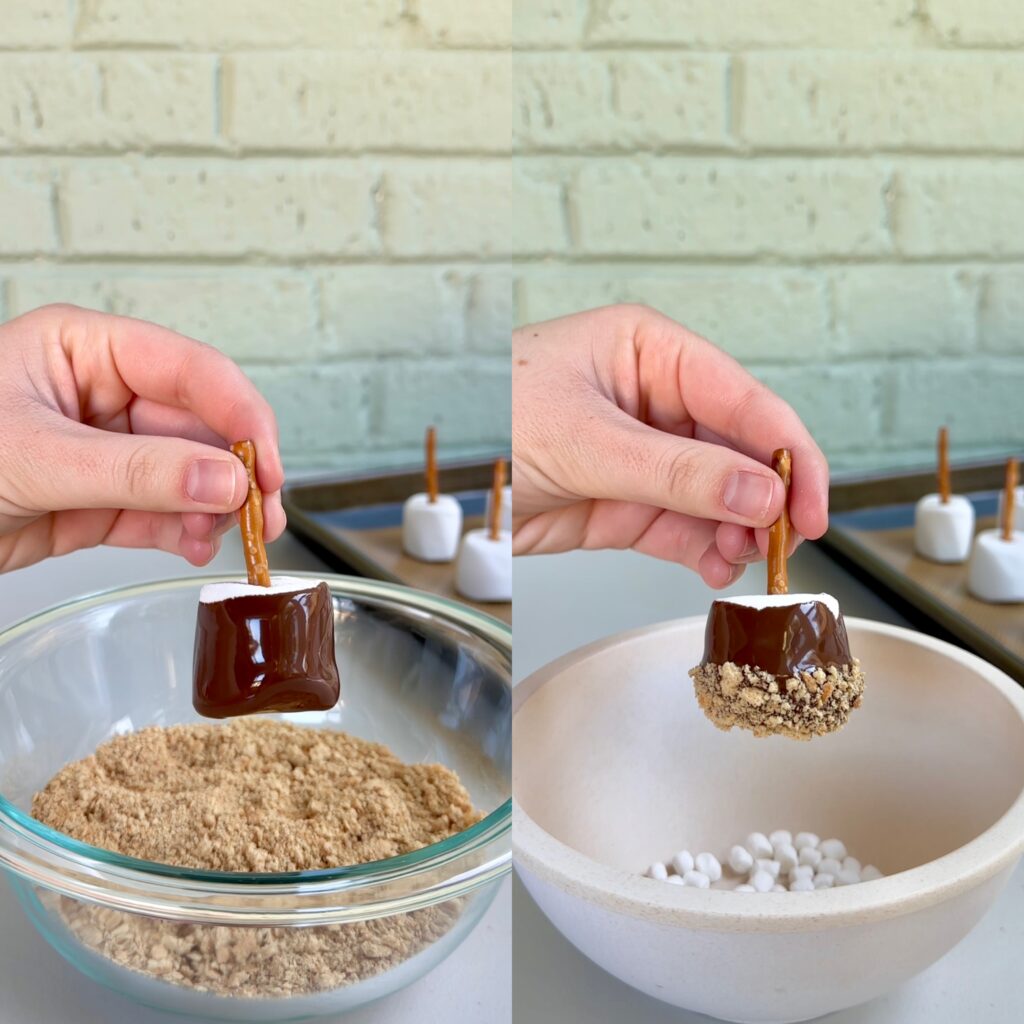
- Dip each marshmallow into the melted chocolate, then dip the bottom half into the bowl of graham cracker crumbs, and sprinkle the top half with marshmallow bits.
- Return to the prepared baking sheet and repeat with remaining marshmallows, then transfer to the fridge for 30 minutes to set the chocolate coating.
You don’t need any special equipment. No baking. No candy thermometer. No complicated steps.
You simply insert the pretzel sticks, melt the chocolate in short intervals until smooth, dip the marshmallows, coat them in graham cracker crumbs, and let them set. That’s it.
Because they’re so simple, they’re perfect for last-minute desserts, birthday parties, holiday trays, or classroom treats. Kids love helping decorate them, and adults love eating them!
They look impressive but take almost no effort — which is the best kind of recipe. 🙂
My top tips:
- DIPPING: It’s important to set up a “dipping station” of the melted chocolate, graham cracker crumbs, and marshmallow bits before you begin coating the marshmallows. This way, you won’t have to create a mess by setting each marshmallow down in between layers- you can just dip directly from bowl to bowl.
- MELTING CHOCOLATE: Adding a little vegetable oil to the chocolate chips is my secret trick for silky smooth chocolate every time. The vegetable oil thins out the chocolate and makes it much easier to dip the marshmallows.
- EXCESS CHOCOLATE: After you dip each marshmallow in chocolate, run the bottom of the marshmallow against the bowl to remove the excess chocolate. You’ll want to scrape all the excess chocolate off the bottom so that it won’t create a pool or “foot” at the bottom.
- GRAHAM CRACKER CRUMBS: You can buy pre-crushed graham cracker crumbs from the store or crush your own. To do this, add the graham crackers to the bowl of a food processor and pulse until they reach your desired size, or place them in a Ziploc bag, and bang the crap out of them with a rolling pin.
- MARSHMALLOW BITS: You’ll want to use marshmallow bits here, not regular mini marshmallows. Marshmallow bits are smaller, and stay fresh for longer once exposed to air.
- CHILLING: You can let these set at room temperature, but it will take hours for the chocolate to fully harden. To speed up the process, I recommend placing these s’mores marshmallows in the fridge for 30 minutes to set the chocolate coating.
- STORING: Store S’mores Marshmallow Pops in an airtight container at room temperature for up to 5 days, or in the refrigerator for up to a week to keep the chocolate firm!
Looking for more marshmallow goodness? Check these out!
- Turtle Dipped Marshmallows
- Marshmallow Peppermint Bark
- Marshmallow Caramel Popcorn
- Caramel Marshmallow Rice Krispie Balls
- Crunchy Brownies
- Fluffernutter Cookie Cups
- Muddy Snowballs
- Avalanche Cookies

S’mores Marshmallow Pops
Ingredients
- 25 marshmallows
- 25 pretzel sticks
- 1 cup milk chocolate chips
- 1 tbsp vegetable oil
- 1/2 cup graham cracker crumbs about 3 sheets
- 1/2 cup marshmallow bits
Instructions
- Insert a pretzel stick into the top of each marshmallow, then place them on a baking sheet with parchment paper or a silicone baking mat.
- In a microwave safe bowl, combine the chocolate chips and vegetable oil. Microwave in 30 second intervals, stirring in between, until melted and smooth.
- Pour your graham cracker crumbs and marshmallow bits into two separate bowls and set aside. This will create a “dipping station”.
- Dip each marshmallow into the melted chocolate, then dip the bottom half into the bowl of graham cracker crumbs, and sprinkle the top half with marshmallow bits.
- Return to the prepared baking sheet and repeat with remaining marshmallows, then transfer to the fridge for 30 minutes to set the chocolate coating.
This post contains Amazon Affiliate links. Dangthatssweet may receive a small commission for Amazon purchases made through these links at no cost to you. Thanks for your support!

Leave a Reply