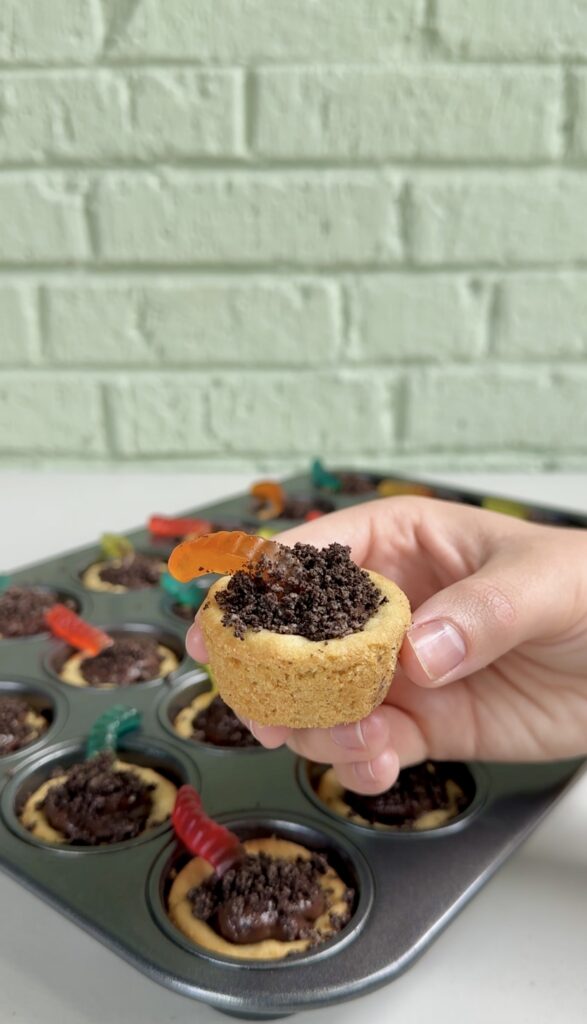
Dirt Pudding Cookie Cups are fun, bite-sized desserts made with sugar cookie dough cups filled with creamy chocolate pudding, topped with crushed cookies and gummy worms for a playful, spooky treat.
To say I love no-bake desserts made with Oreo cookies around here would be an understatement. These Oreo Truffle Stuffed Strawberries are my favorite, but Oreo Dip and Cookies and Cream Bark are coming in as close seconds!
Why you’ll love this recipe:
If you’re looking for a dessert that’s as fun to make as it is to eat, Dirt Pudding Cookie Cups are the answer! These adorable little treats combine the best of both worlds — chewy cookie cups, creamy chocolate pudding, and a crunchy “dirt” topping made from crushed Oreo cookies. Add a few gummy worms, and you’ve got a spooky-cute Halloween dessert that’s guaranteed to be a hit with kids and adults alike.
Halloween desserts should be fun, festive, and easy — and these little cookie cups check all the boxes. They look like tiny pots of edible dirt, complete with wiggly worms poking out of the top. You can even customize them with candy pumpkins, candy bones, or tombstone-shaped cookies for an extra spooky touch.
They’re also great for parties or classroom treats because they’re individually portioned and easy to grab and go. No cutting, scooping, or messy serving spoons — just simple, handheld fun. They’re cute, creative, and irresistibly chocolatey — everything a Halloween dessert should be!
Ingredients you’ll need:
- Sugar cookie dough- store-bought
- Instant chocolate pudding mix
- Milk
- Gummy worms
- Oreo cookies- crushed
Dirt cups are a nostalgic kid-favorite dessert that adults adore just as much as the little ones. This easy recipe takes dirt cups to a whole new level by transforming them into decadent cookie cups! They use simple, store-bought ingredients like refrigerated cookie dough and instant pudding, so there’s minimal prep and no complicated steps.
Dirt Pudding Cookie Cups are a creative twist on the classic “dirt pudding” dessert you might remember from childhood. Traditionally, dirt pudding is made with layers of chocolate pudding, crushed Oreos, and gummy worms. But in this version, the pudding is served inside an edible cookie cup made from store-bought cookie dough — no bowls or cups required!
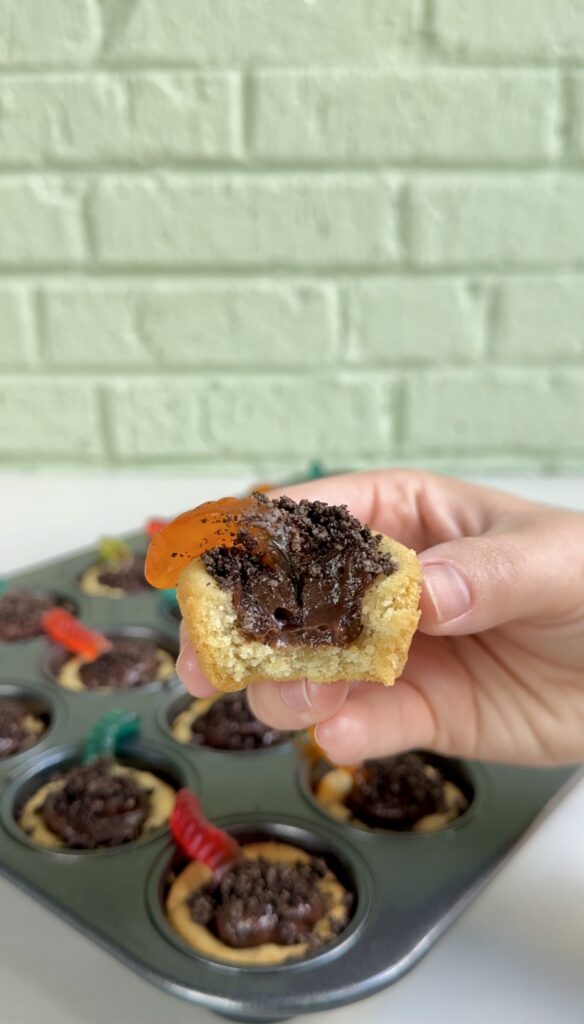
Each bite is a perfect combination of soft, chewy cookie, rich chocolate pudding, and crunchy cookie crumbs. It’s sweet, satisfying, and completely irresistible.
How to make the best Dirt Pudding Cookie Cups:
- Preheat your oven to 350 degrees F and spray a 24-cup mini muffin tin with non-stick cooking spray.
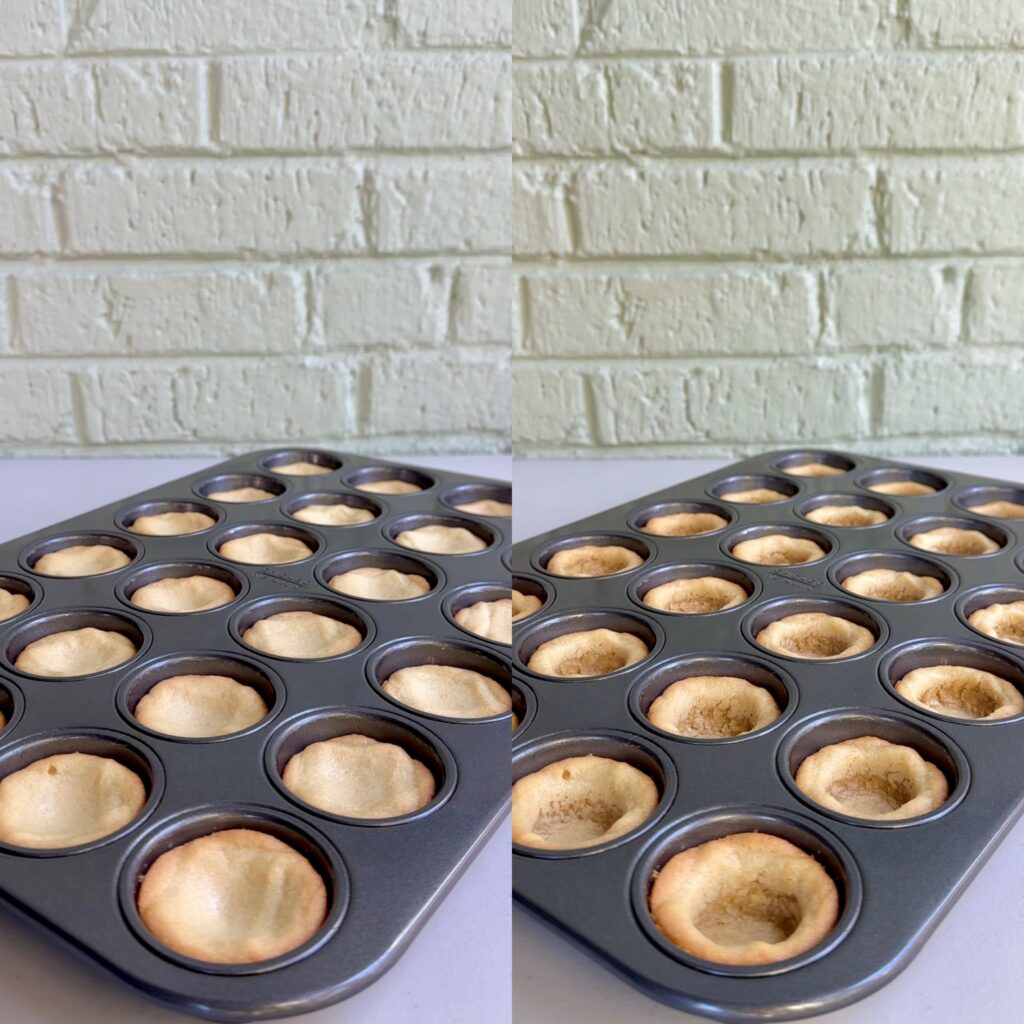
- Grab your sugar cookie dough and slice it into 24 equal squares (just follow the perforated lines), then drop one square of cookie dough into each mini muffin tin cavity.
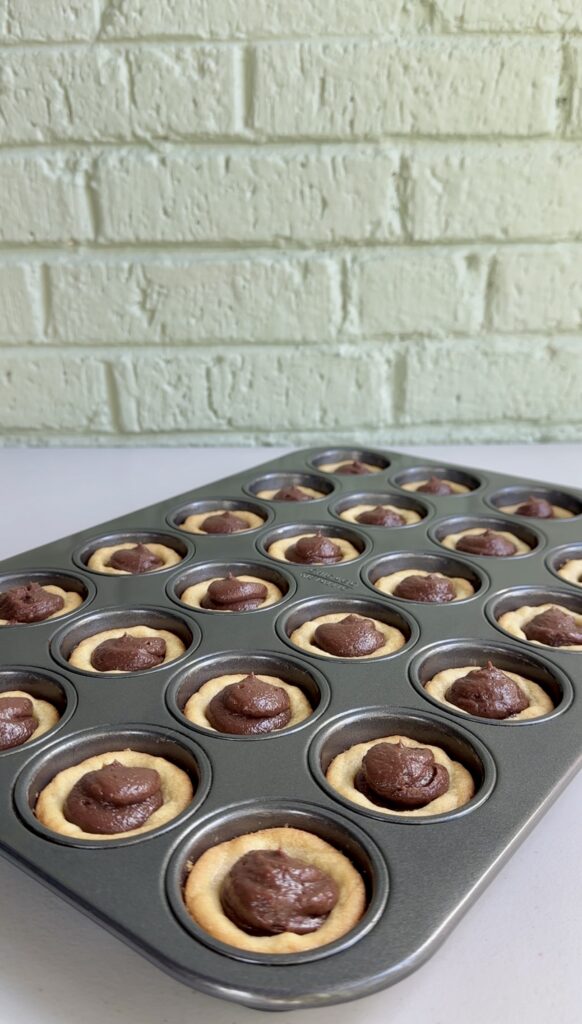
- Bake for 15-17 minutes, then immediately take the handle of a spoon or spatula and press down in the center of each cookie to create a well and set aside to cool.
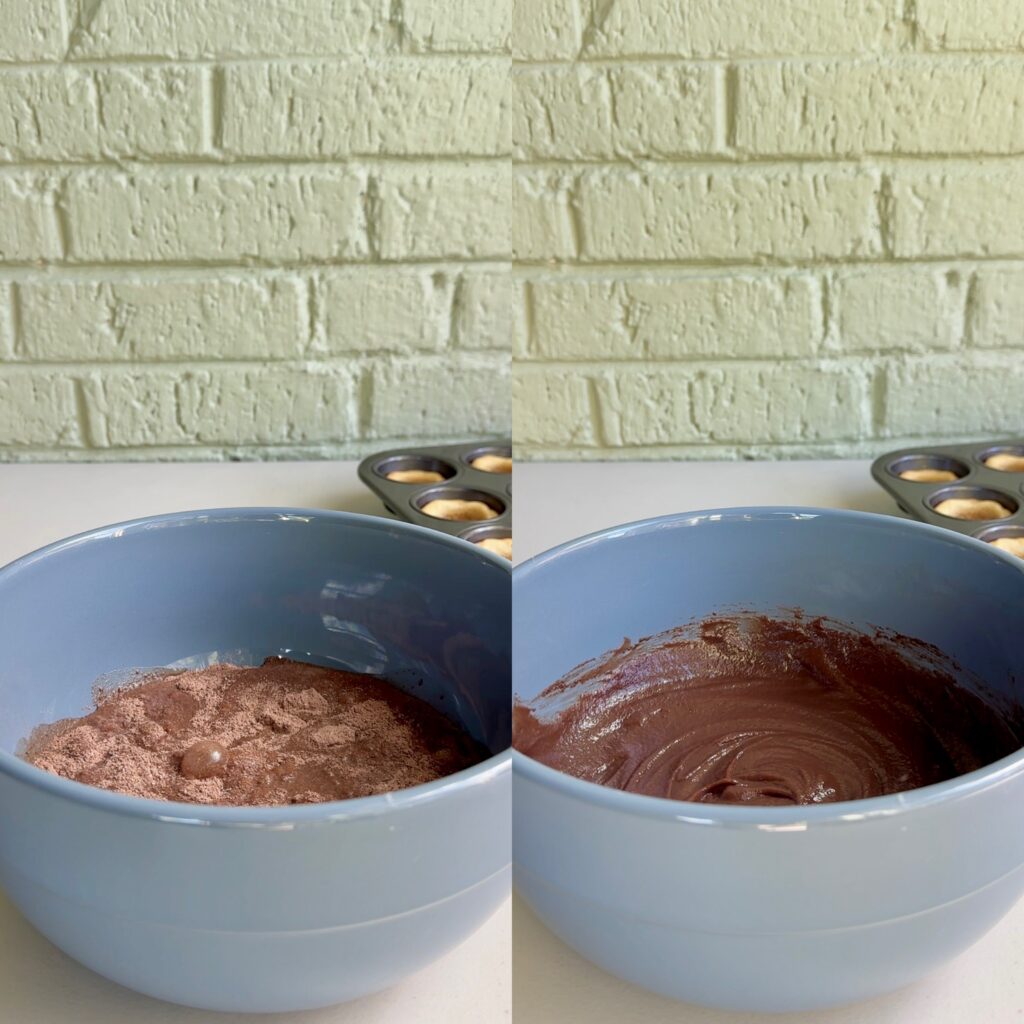
- In a medium mixing bowl, combine instant chocolate pudding mix and milk, then whisk to dissolve any lumps and set aside for 5 minutes to thicken.
- Transfer the chocolate pudding into a piping bag or Ziploc bag, cut off one end, and generously fill each cookie cup.
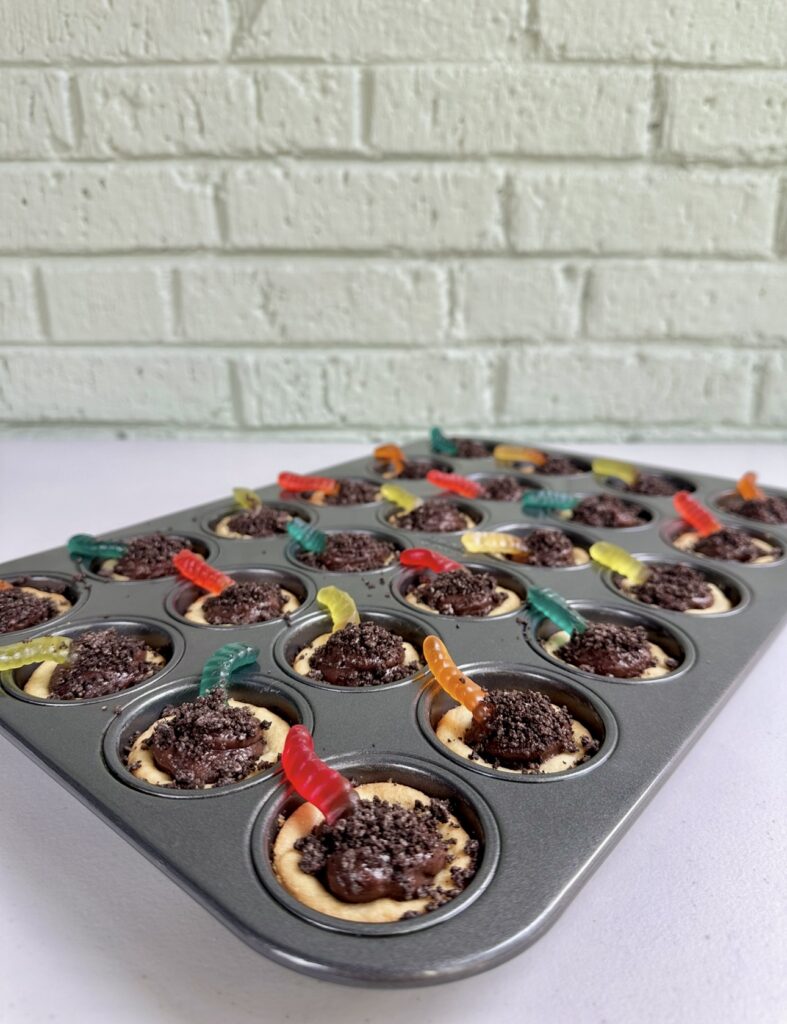
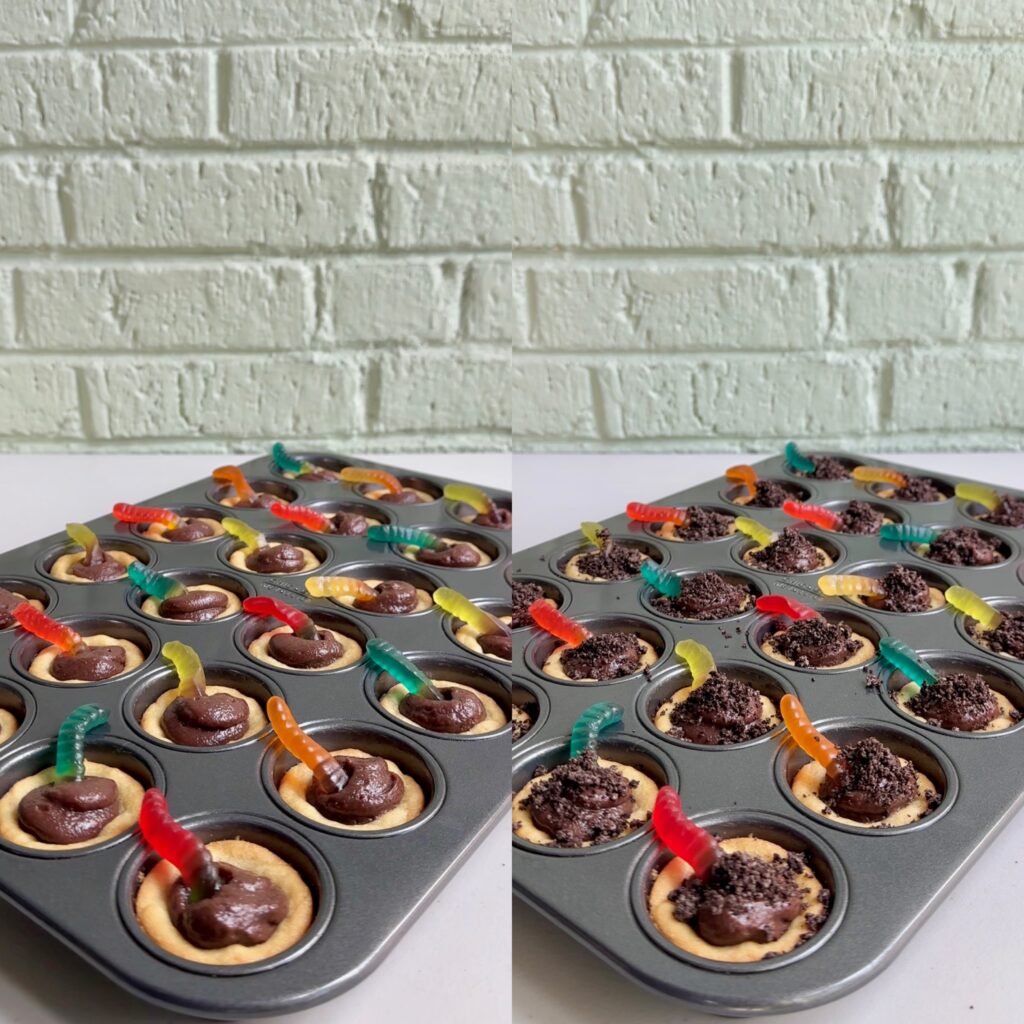
- Top each cookie cup with a gummy worm and crushed Oreo cookies before enjoying!
There’s something nostalgic and playful about “dirt pudding.” It’s a classic no-bake dessert that’s been delighting kids (and adults who act like kids) for decades. Turning it into cookie cups takes the idea to the next level — literally. Instead of a bowl or cup, each serving is a bite-sized cookie cup made from store-bought cookie dough. The cookie base adds a buttery, chewy crunch that perfectly balances the creamy, chocolatey pudding.
Imagine a soft sugar cookie, filled with silky pudding, topped with crushed Oreos and a gummy worm. Each bite is a mix of textures — sweet, smooth, crunchy, and chewy. It’s comfort food dressed up for Halloween!
They even look like tiny pots of edible dirt — complete with cookie “soil,” chocolate pudding “mud,” and gummy worms wiggling on top — but they taste like pure dessert heaven. Perfect for Halloween parties, classroom treats, birthdays, or anytime you want a themed, individual dessert that looks impressive but takes little effort.
My top tips:
- GREASE YOUR PAN: Grease your mini muffin tin liberally with non-stick cooking spray before adding the squares of cookie dough. It’s no fun to make a dessert just for it to get stuck in the pan!
- COOKIE DOUGH: Using store-bought sugar cookie dough is a huge time saver here! I recommend buying the package of sugar cookie dough that comes with 24 pre-portioned squares so that all you need to do is cut along the perforated lines, then place one piece of cookie dough into each mini muffin tin cavity.
- CREATING THE WELLS: You’ll want to press down the centers of each cookie cup while the cookies are still warm from the oven. I just used the rounded end of a spatula handle I had, but if you own a tart tamper, that would be even more efficient!
- COOLING: It’s important to let the cookie cups cool completely before filling them with pudding. If you fill warm cookies, the cookies will likely absorb the filling and become soggy.
- INSTANT PUDDING: Make sure the chocolate pudding mix you’re using is instant! The instant pudding will thicken without having to cook it on the stove and that’s exactly what we want. Once the instant pudding is combined with cold milk, it’ll only take 3-5 minutes to thicken on its own.
- PIPING BAG: Transferring the chocolate pudding into a piping bag helps control how much filling you’re piping into the cookie cups and in turn, keeps them nice and neat. You can also use a Ziploc bag here.
- OREO CRUMBS: No food processor? No problem! Using a food processor ensures even, small cookie pieces, but if you don’t have one, you can put the Oreos in a resealable bag and crush them with a rolling pin, mallet, or something similar. Just be sure that there aren’t any extra-large chunks of cookies left when you’re done.
- REMOVING FROM THE PAN: I don’t recommend removing these cookie cups from the muffin tin until they are fully cooled. If the edges of the cookies seem to be stuck to the pan, run a butter knife around the edges to loosen each cup.
- STORING: Leftover cookie cups do need to be stored in the fridge because the pudding is perishable. They’ll keep for up to 4 days stored in an airtight container. I recommend waiting to add the gummy worm and Oreo toppings until you are ready to enjoy.
Looking for more Halloween treats? Check these out!
- Pumpkin Patch Dirt Cups
- Halloween Monster Munch Popcorn
- Frankenstein Rice Krispies Treats
- Oreo Spiders
- Pretzel Eyeballs
- Oreo Witch Hat Cookies
- Nutter Butter Mummies

Dirt Pudding Cookie Cups
Ingredients
- 1 (16 oz) package sugar cookie dough store-bought
- 1 (3.4 oz) box instant chocolate pudding mix
- 1 cup milk
- 24 gummy worms
- 6 Oreos crushed
Instructions
- Preheat your oven to 350 degrees F and spray a 24-cup mini muffin tin with non-stick cooking spray.
- Grab your sugar cookie dough and slice it into 24 equal squares (just follow the perforated lines), then drop one square of cookie dough into each mini muffin tin cavity.
- Bake for 15-17 minutes, then immediately take the handle of a spoon or spatula and press down in the center of each cookie to create a well and set aside to cool.
- In a medium mixing bowl, combine instant chocolate pudding mix and milk, then whisk to dissolve any lumps and set aside for 5 minutes to thicken.
- Transfer the chocolate pudding into a piping bag or Ziploc bag, cut off one end, and generously fill each cookie cup.
- Top each cookie cup with a gummy worm and crushed Oreo cookies before enjoying!
This post contains Amazon Affiliate links. Dangthatssweet may receive a small commission for Amazon purchases made through these links at no cost to you. Thanks for your support!

Leave a Reply