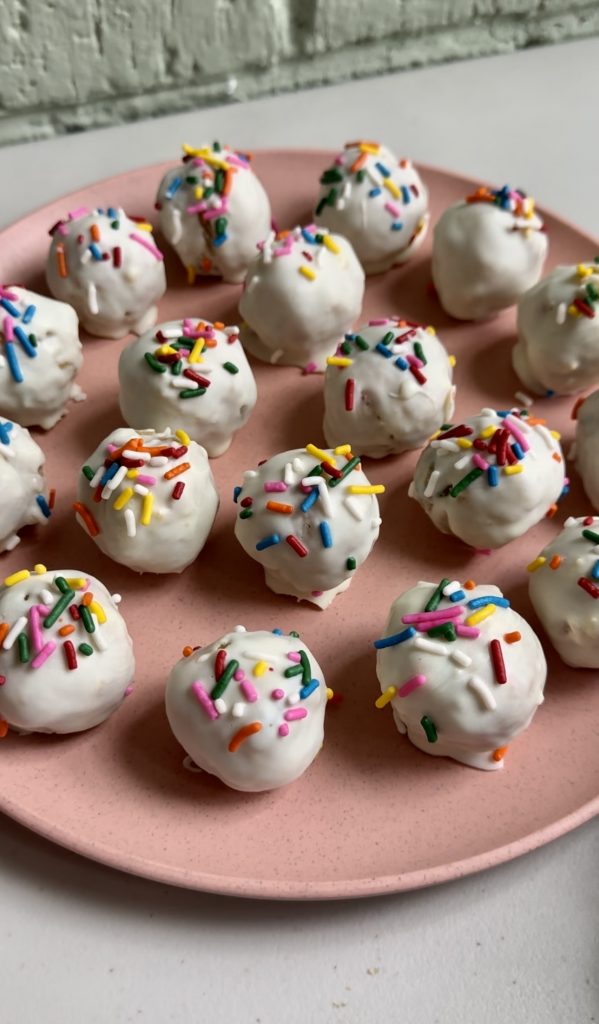
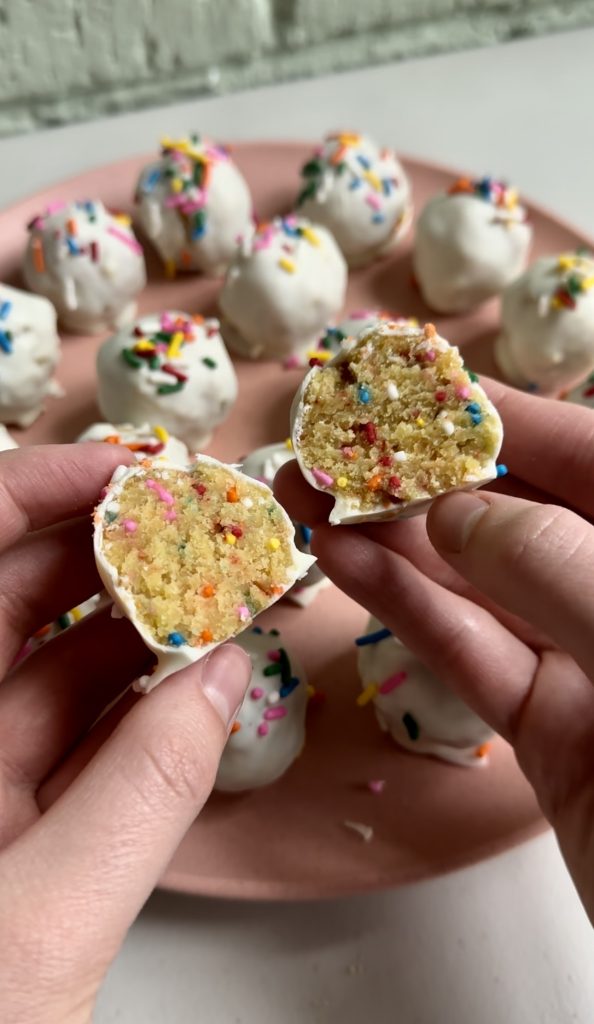
Birthday cake truffles make any day feel like a special occasion! Vanilla cake and sprinkles get rolled into bite-sized perfection, covered in melted white chocolate and finished with more sprinkles on top!
Why you’ll love these easy birthday cake truffles:
Perfectly sweet and soft on the inside, these delicious birthday cake truffles are basically cake pops without the stick! Save the money on your next Starbucks run and make a whole batch of these cake truffles from home for way less $$$!
Ingredients you’ll need:
- Yellow cake mix- baked according to box instructions
- Milk
- Vanilla extract
- Almond extract
- Rainbow sprinkles
- White chocolate chips
- Coconut oil- optional, to thin out the chocolate
I’ve simplified this recipe by using store-bought cake mix which allows these to come together quickly with little to no skill required! Swap out the sprinkles for different holidays and you’ll have the perfect bite sized treat for any occasion!
How to make the best birthday cake truffles:
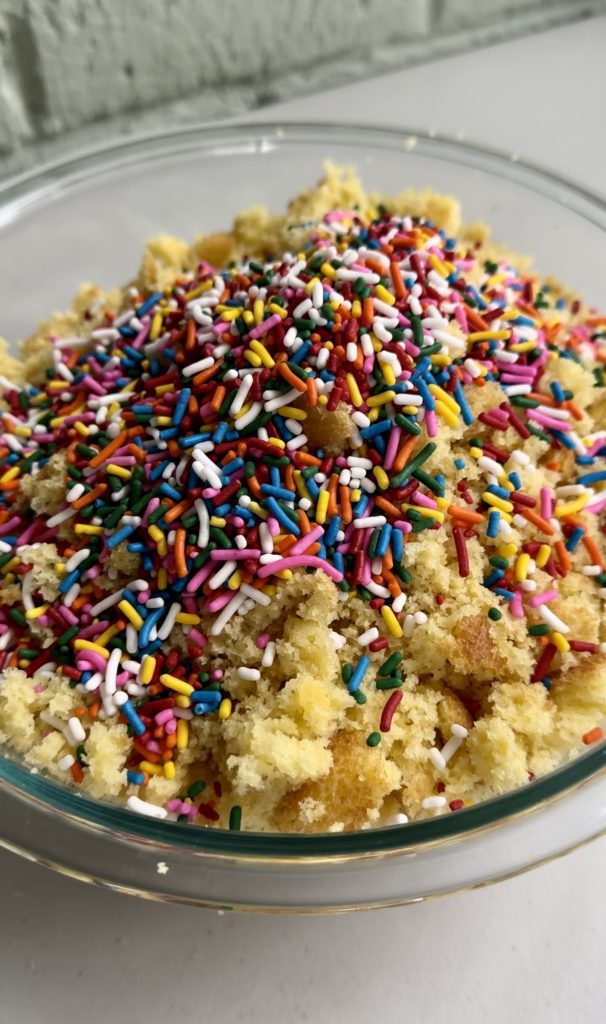
- Start by baking your yellow cake mix according to box instructions. Let cool in the pan for 5 minutes, then break up the warm cake into crumbs. Transfer the cake crumbs to a large mixing bowl.
- Add milk, vanilla extract, almond extract, and sprinkles to the bowl of cake. Using clean hands, mix to combine until the mixture holds together.
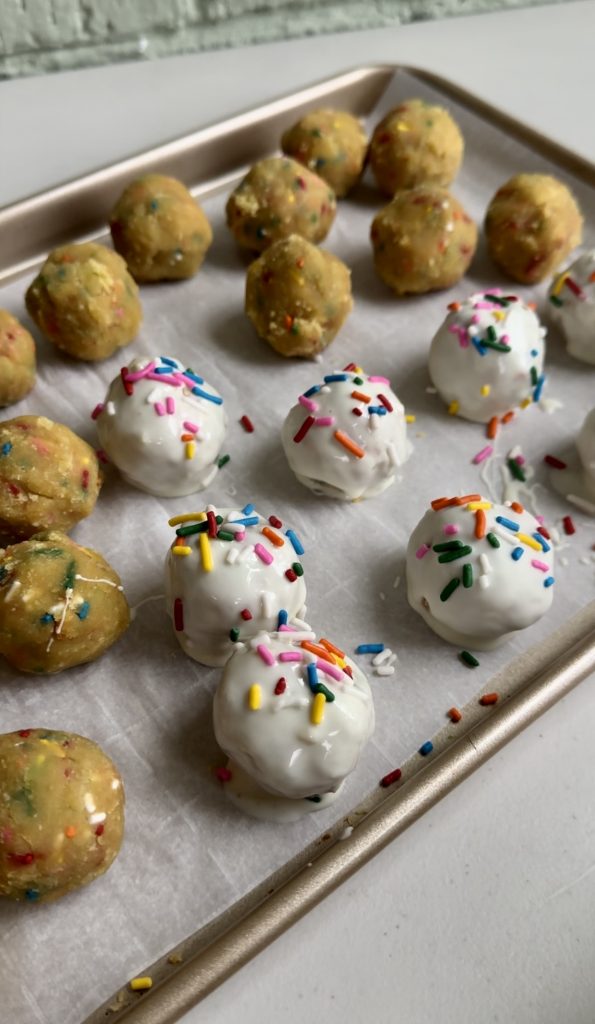
- Squeeze and press the cake mixture in between your hands to form 2-inch sized balls. Chill the balls in the fridge for 10 minutes.
- In a microwave safe bowl, melt the white chocolate in 30 second increments, stirring in between until smooth. If the chocolate seems too thick, add the coconut oil to thin it out.
- Working one by one, cover each cake ball in the melted chocolate. Tap off any excess chocolate, then place on parchment paper. Immediately top with sprinkles.
- Let the chocolate firm up before serving. To speed this up, place the truffles in the fridge for 30 minutes or in the freezer for 10.

My top tips:
- Break up your cake while it’s still warm from the oven. Making the cake ball mixture with a warm cake traps some of the excess steam and keeps the mixture moist. The extra moisture helps the cake mixture hold together when you roll it into balls.
- Don’t be afraid of overworking the cake ball mixture. You’ll need to really press the crumbs together to get them shaped into balls. Surprisingly, overworking the mixture makes the cake balls softer and chewier rather than dense and dry!
- Carefully watch your white chocolate while it’s melting. White chocolate is prone to seizing up and becoming lumpy if you heat it for too long. You’ll want to microwave the chocolate in 30 second increments, stirring in between until its smooth. If it seems too thick, add a tbsp of coconut oil to thin it out.
- I highly recommend placing the chocolate covered cake balls on parchment paper to let the chocolate harden. This ensures the chocolate coating won’t stick to anything and you’ll have beautiful, smooth cake truffles!
- Top each truffle with sprinkles immediately after it is coated in chocolate. The chocolate needs to still be liquid for the sprinkles to adhere and stick to the surface.
Looking for more birthday cake recipes? Try these out!

Birthday Cake Truffles
Ingredients
- 1 (15 oz) box yellow cake mix baked according to box instructions
- 1/4 cup milk
- 2 tsp vanilla extract
- 1/2 tsp almond extract
- 1/2 cup rainbow sprinkles plus more for topping
- 2 cups white chocolate chips
- 1 tbsp coconut oil optional
Instructions
- Start by baking your yellow cake mix according to box instructions. Let cool in the pan for 5 minutes, then break up the warm cake into crumbs. Transfer the cake crumbs to a large mixing bowl.
- Add milk, vanilla extract, almond extract, and sprinkles to the bowl of cake. Using clean hands, mix to combine until the mixture holds together.
- Squeeze and press the cake mixture in between your hands to form 2-inch sized balls. Chill the balls in the fridge for 10 minutes.
- In a microwave safe bowl, melt the white chocolate in 30 second increments, stirring in between until smooth. If the chocolate seems too thick, add the coconut oil to thin it out.
- Working one by one, cover each cake ball in the melted chocolate. Tap off any excess chocolate, then place on parchment paper. Immediately top with sprinkles.
- Let the chocolate firm up before serving. To speed this up, place the truffles in the fridge for 30 minutes or in the freezer for 10.
This post contains Amazon Affiliate links. Dangthatssweet may receive a small commission for Amazon purchases made through these links at no cost to you. Thanks for your support!

Leave a Reply